In the last section, we saw an example of creating a blue filter and thought about how to create the grey filter. Now, let us create our grey filter together.
Example - Create a grey filter
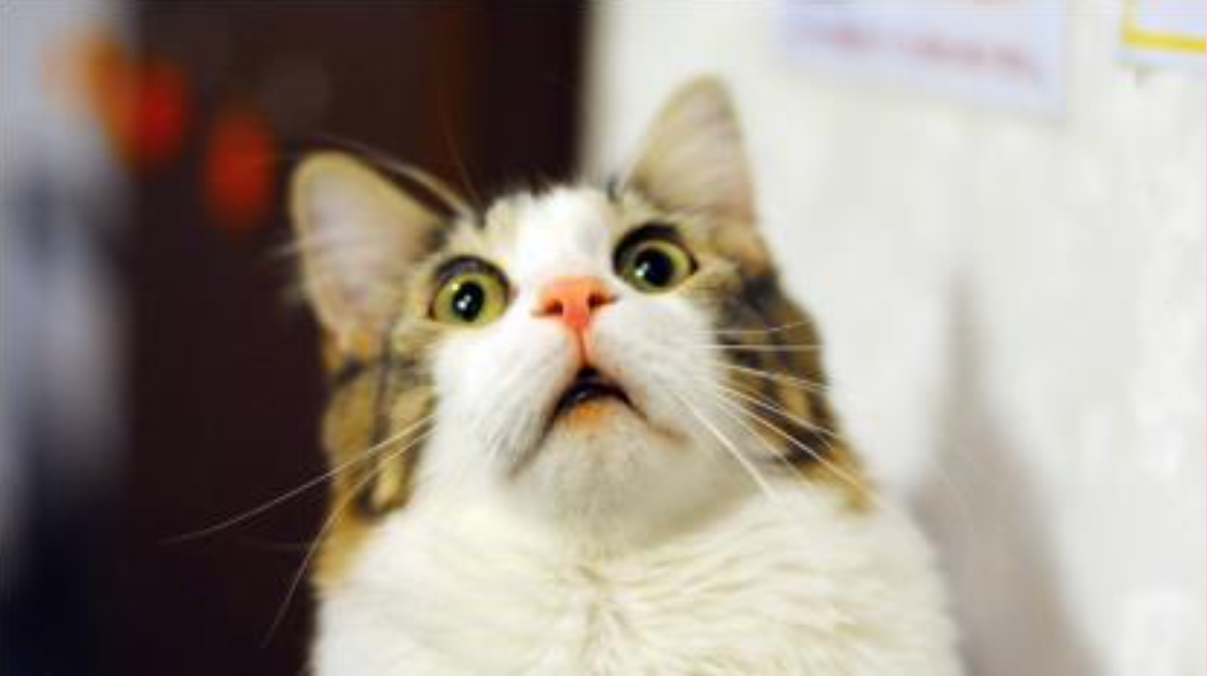
Let us change the original cat image below with our grey filter together!
# We need to import PIL package to allow manipulation with pixels.
from PIL import Image

# Open the cat image
img = Image.open("cat.png")

# Grey filters
for i in range(img.size[0]): # For every col:
    for j in range(img.size[1]): # For every row
        color = img.getpixel( (i,j)) # Get color
        GREY = (color[0] + color[1] + color[2]) // 3 # Average the pixel values
        img.putpixel((i,j),(GREY, GREY, GREY)) # Set the color accordingly

# Save the cat after filtering
img.save("Mycat.png")
Remember, to set a grey pixel all three values of RGB have to be the same. However, setting each pixel to the same random value (ex. 200) will make the whole image grey, rather than just adding a filter on top of the existing cat image.
How can we best figure out how to set a pixel to be the ‘greyed’ version of it? We can take an average of each value of the RGB colors. You can use // to do an integer division, which guarantees that the result of the average operation is a whole number.
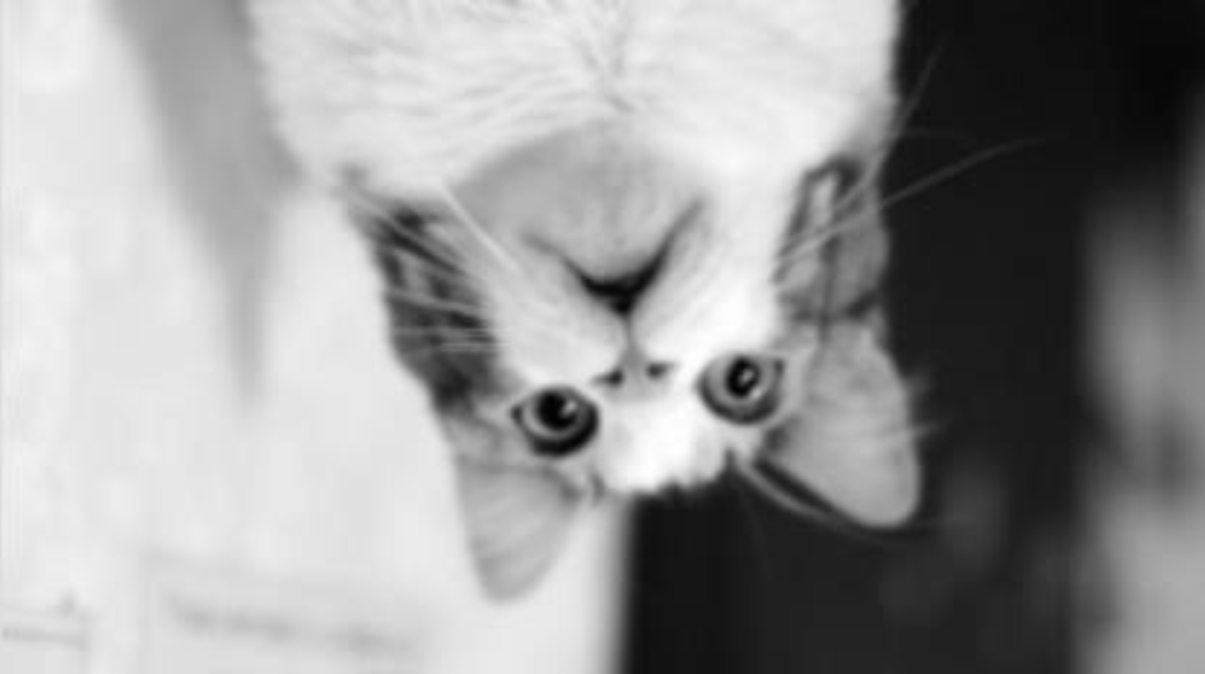
Wow! This is our cat after the grey filter.
Example - Partial filter
Now, let us think about how to add filter on only part of our lovely cat.
# We need to import PIL package to allow manipulation with pixels.
from PIL import Image

# Open the cat image
img = Image.open("cat.png")

# Grey filters
for i in range((img.size[0] // 2)): # For first-half columns
    for j in range((img.size[1] // 2)): # For first-half rows
        color = img.getpixel((i,j)) # Get color
        GREY = (color[0] + color[1] + color[2]) // 3 # Average the pixel values
        img.putpixel((i,j),(GREY, GREY, GREY)) # Set the colour accordingly

#Save the cat after filtering
img.save("Mycat.png")
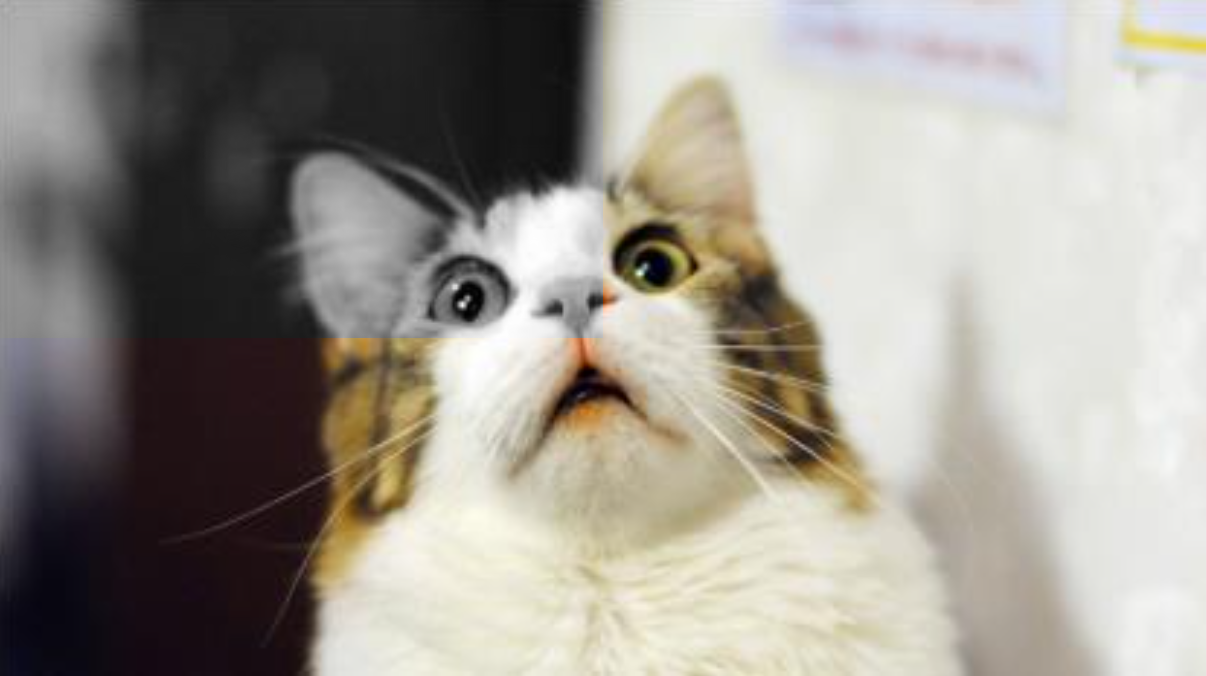
Wow! This is our cat after the filter. We only filtered one-forth of the cat on the upper left corner!
Challenge - Create your own partial filter
It’s now your turn to filter whichever part you want with different kinds of filters on the cute cat! Exciting!
Advanced
Wouldn’t it be nice if we could take the steps above and make it simpler? Let’s do this by using the Pillow ImageFilter function filter() & convert().
To use the filter() function, you can specify the ImageFilter type within the parentheses. For example, image.filter(ImageFilter.BLUR) will make the image blurry. Or, if you use ImageFilter.CONTOUR instead, it will add a ‘sketch’ type effect to your image.
For example, for the ‘img’ above:
    blurredImage = img.filter(ImageFilter.BLUR)
    blurredImage.save("myCatBlurred.jpg")
You should see the saved cat image is blurred. Try this with a few other image filters until you find one you like!
Additionally, we can use the convert() function to set our image to black & white. To use this function, you can specify the mode you want to convert your image to. The most common ones are “L”, which converts an image to greyscale, and “RGB” which converts an image to its true color.
Let’s try it out like this:
    greyscaleImage = img.convert("L")
    greyscaleImage.save("myCatBW.jpg")
If you combine the blurred function and the black and white convert function, you’ll get something like this – purrfect!