We have made some pretty solid enemies, but now there’s something wrong - they don’t actually do anything to you! Specifically, they can’t actually hurt you in any way. Let’s change that. In the final game, there will be two ways you can get damaged: getting shot by an enemy laser, or directly touching the enemy. Let’s start with the latter since it is a bit easier.
Collision is relatively easy in Phaser.
Let’s first start by importing an explosion sprite sheet and implementing its animation in Scene 1:
This will be an explosion that plays when the player is destroyed!
Phaser has very convenient ways to handle collision between objects. We can simply add the below line to the create() method in Scene 2:
this.physics.add.overlap(this.player, this.enemies, this.hurtPlayer, null, this);
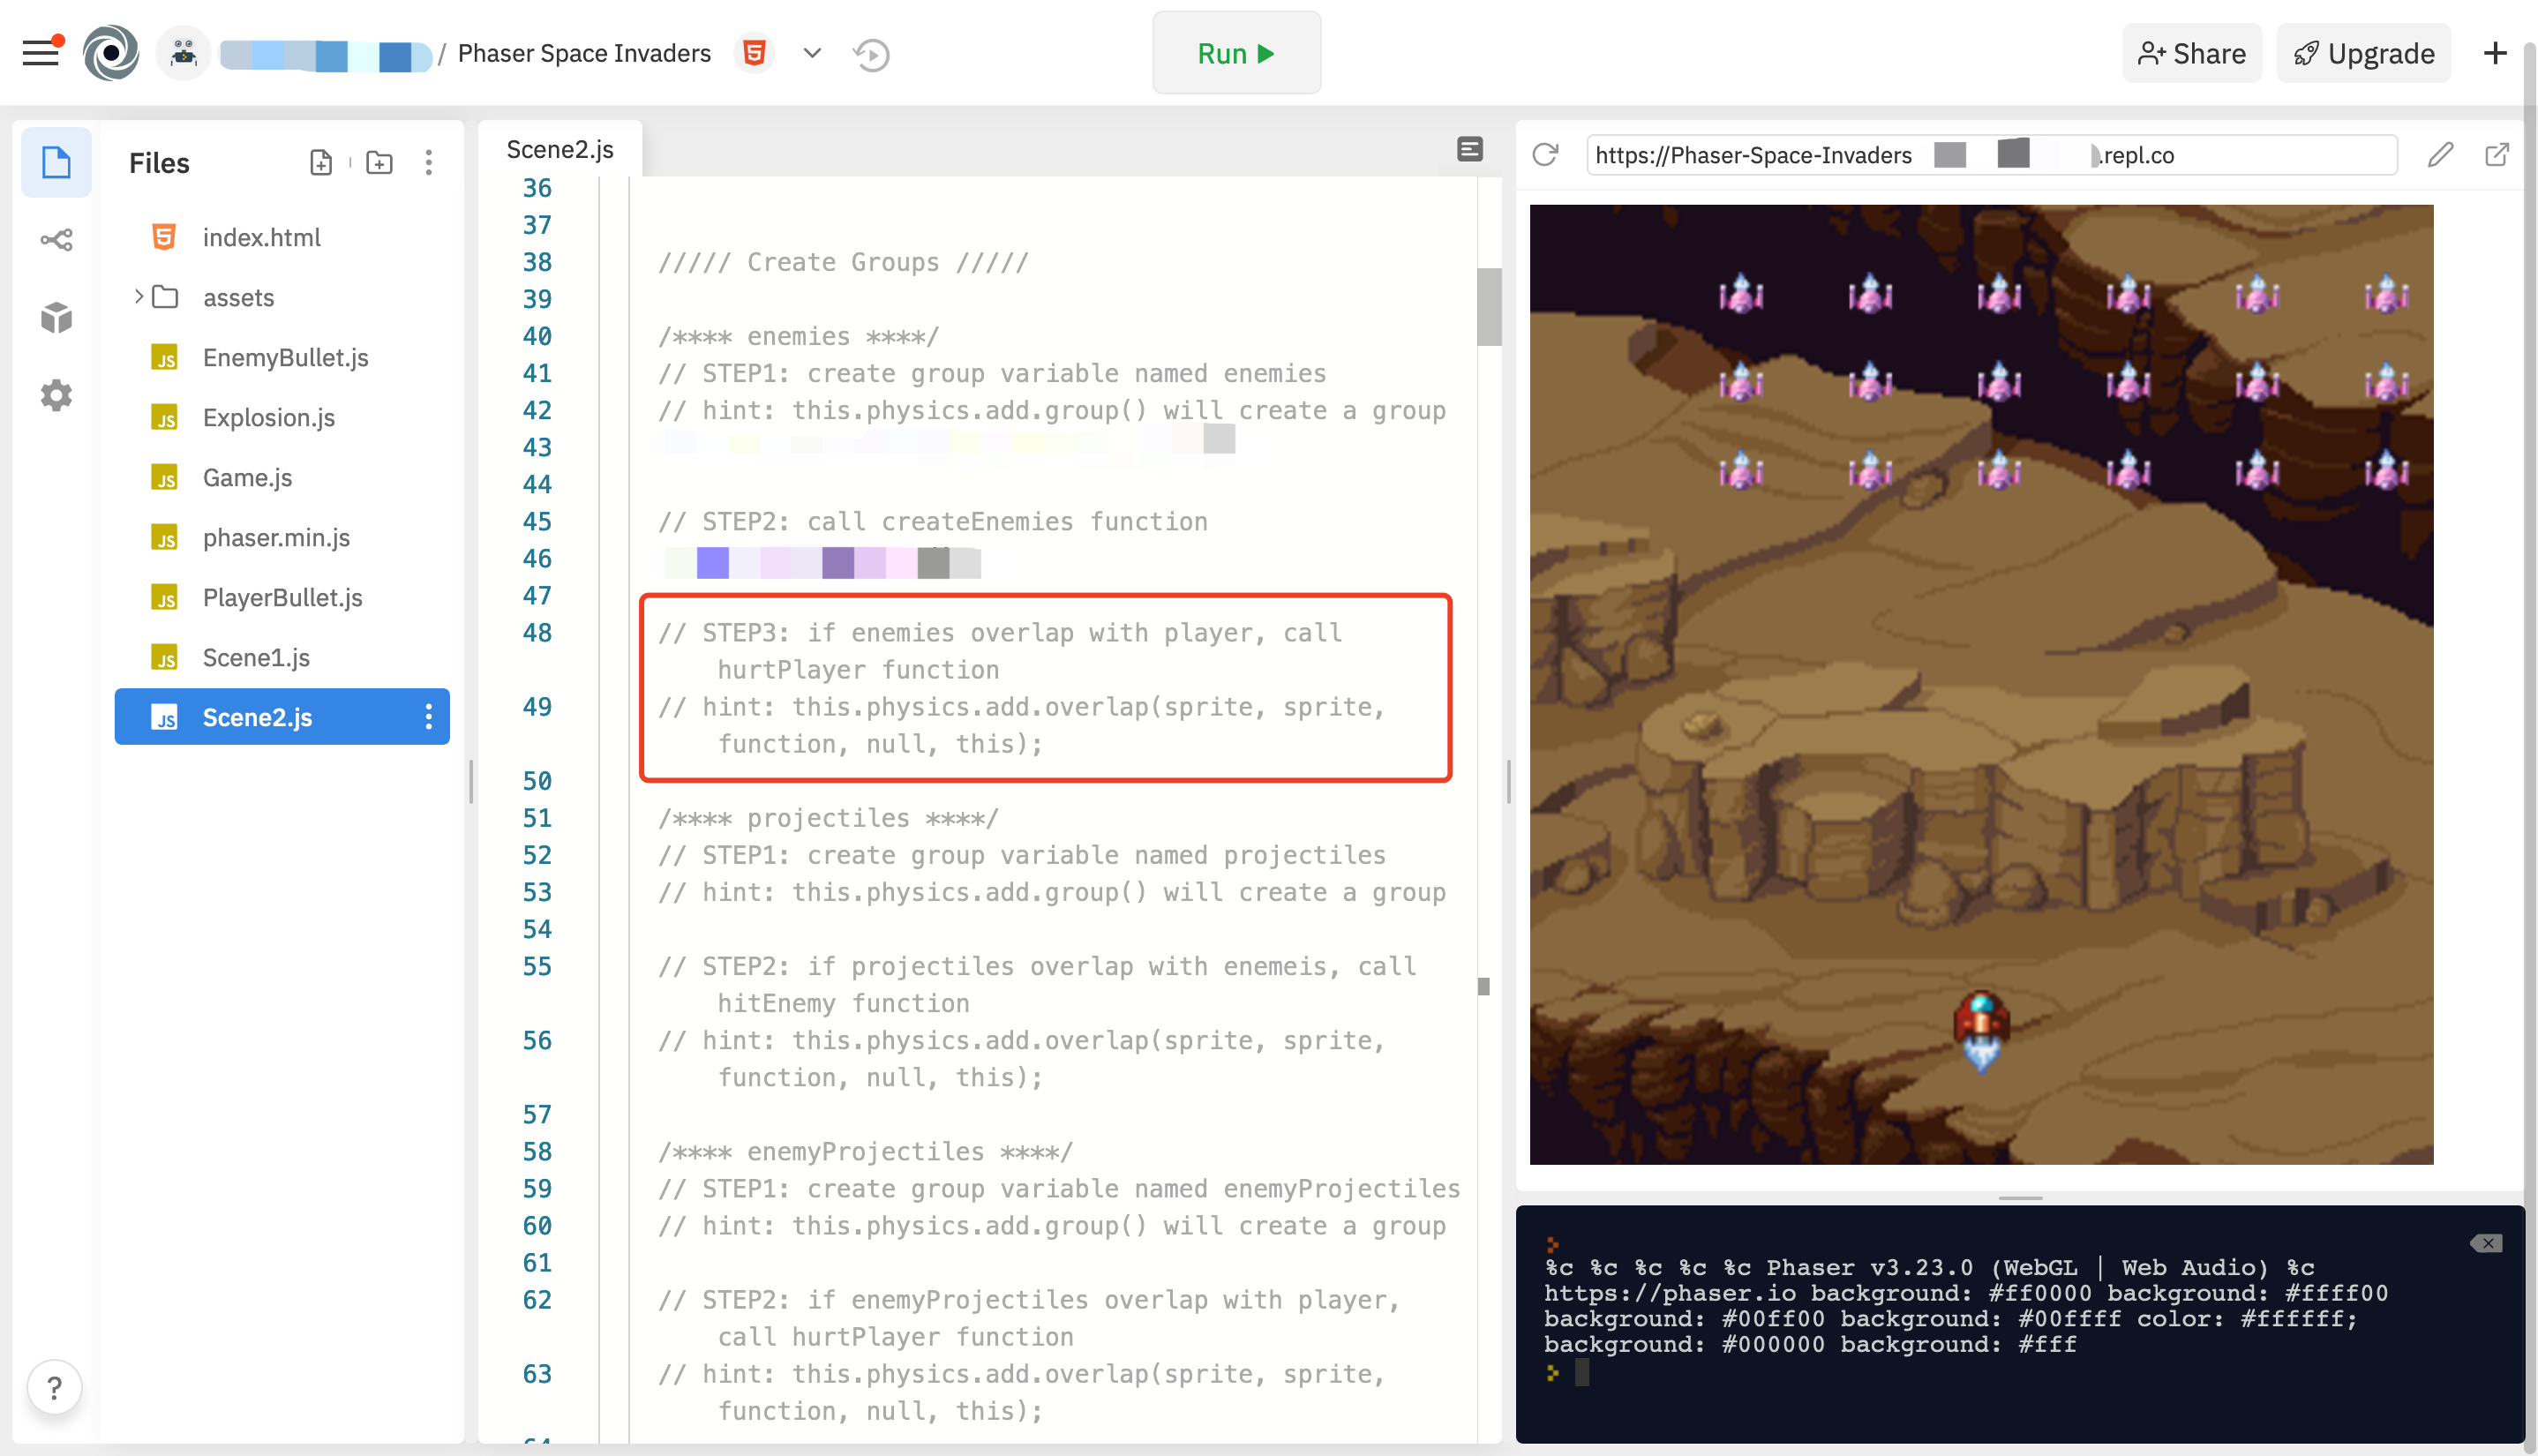
What this line does is call the hurtPlayer() method when this.player and a member of the group this.enemies overlap. It will call hurtPLayer with this.player and this.enemies as arguments.
This line will make it so that the hurtPlayer() method is called when the player and an object in the enemy group touches each other with the player and enemy variable passed to the method as arguments. Now let’s create the hurtPlayer() method:
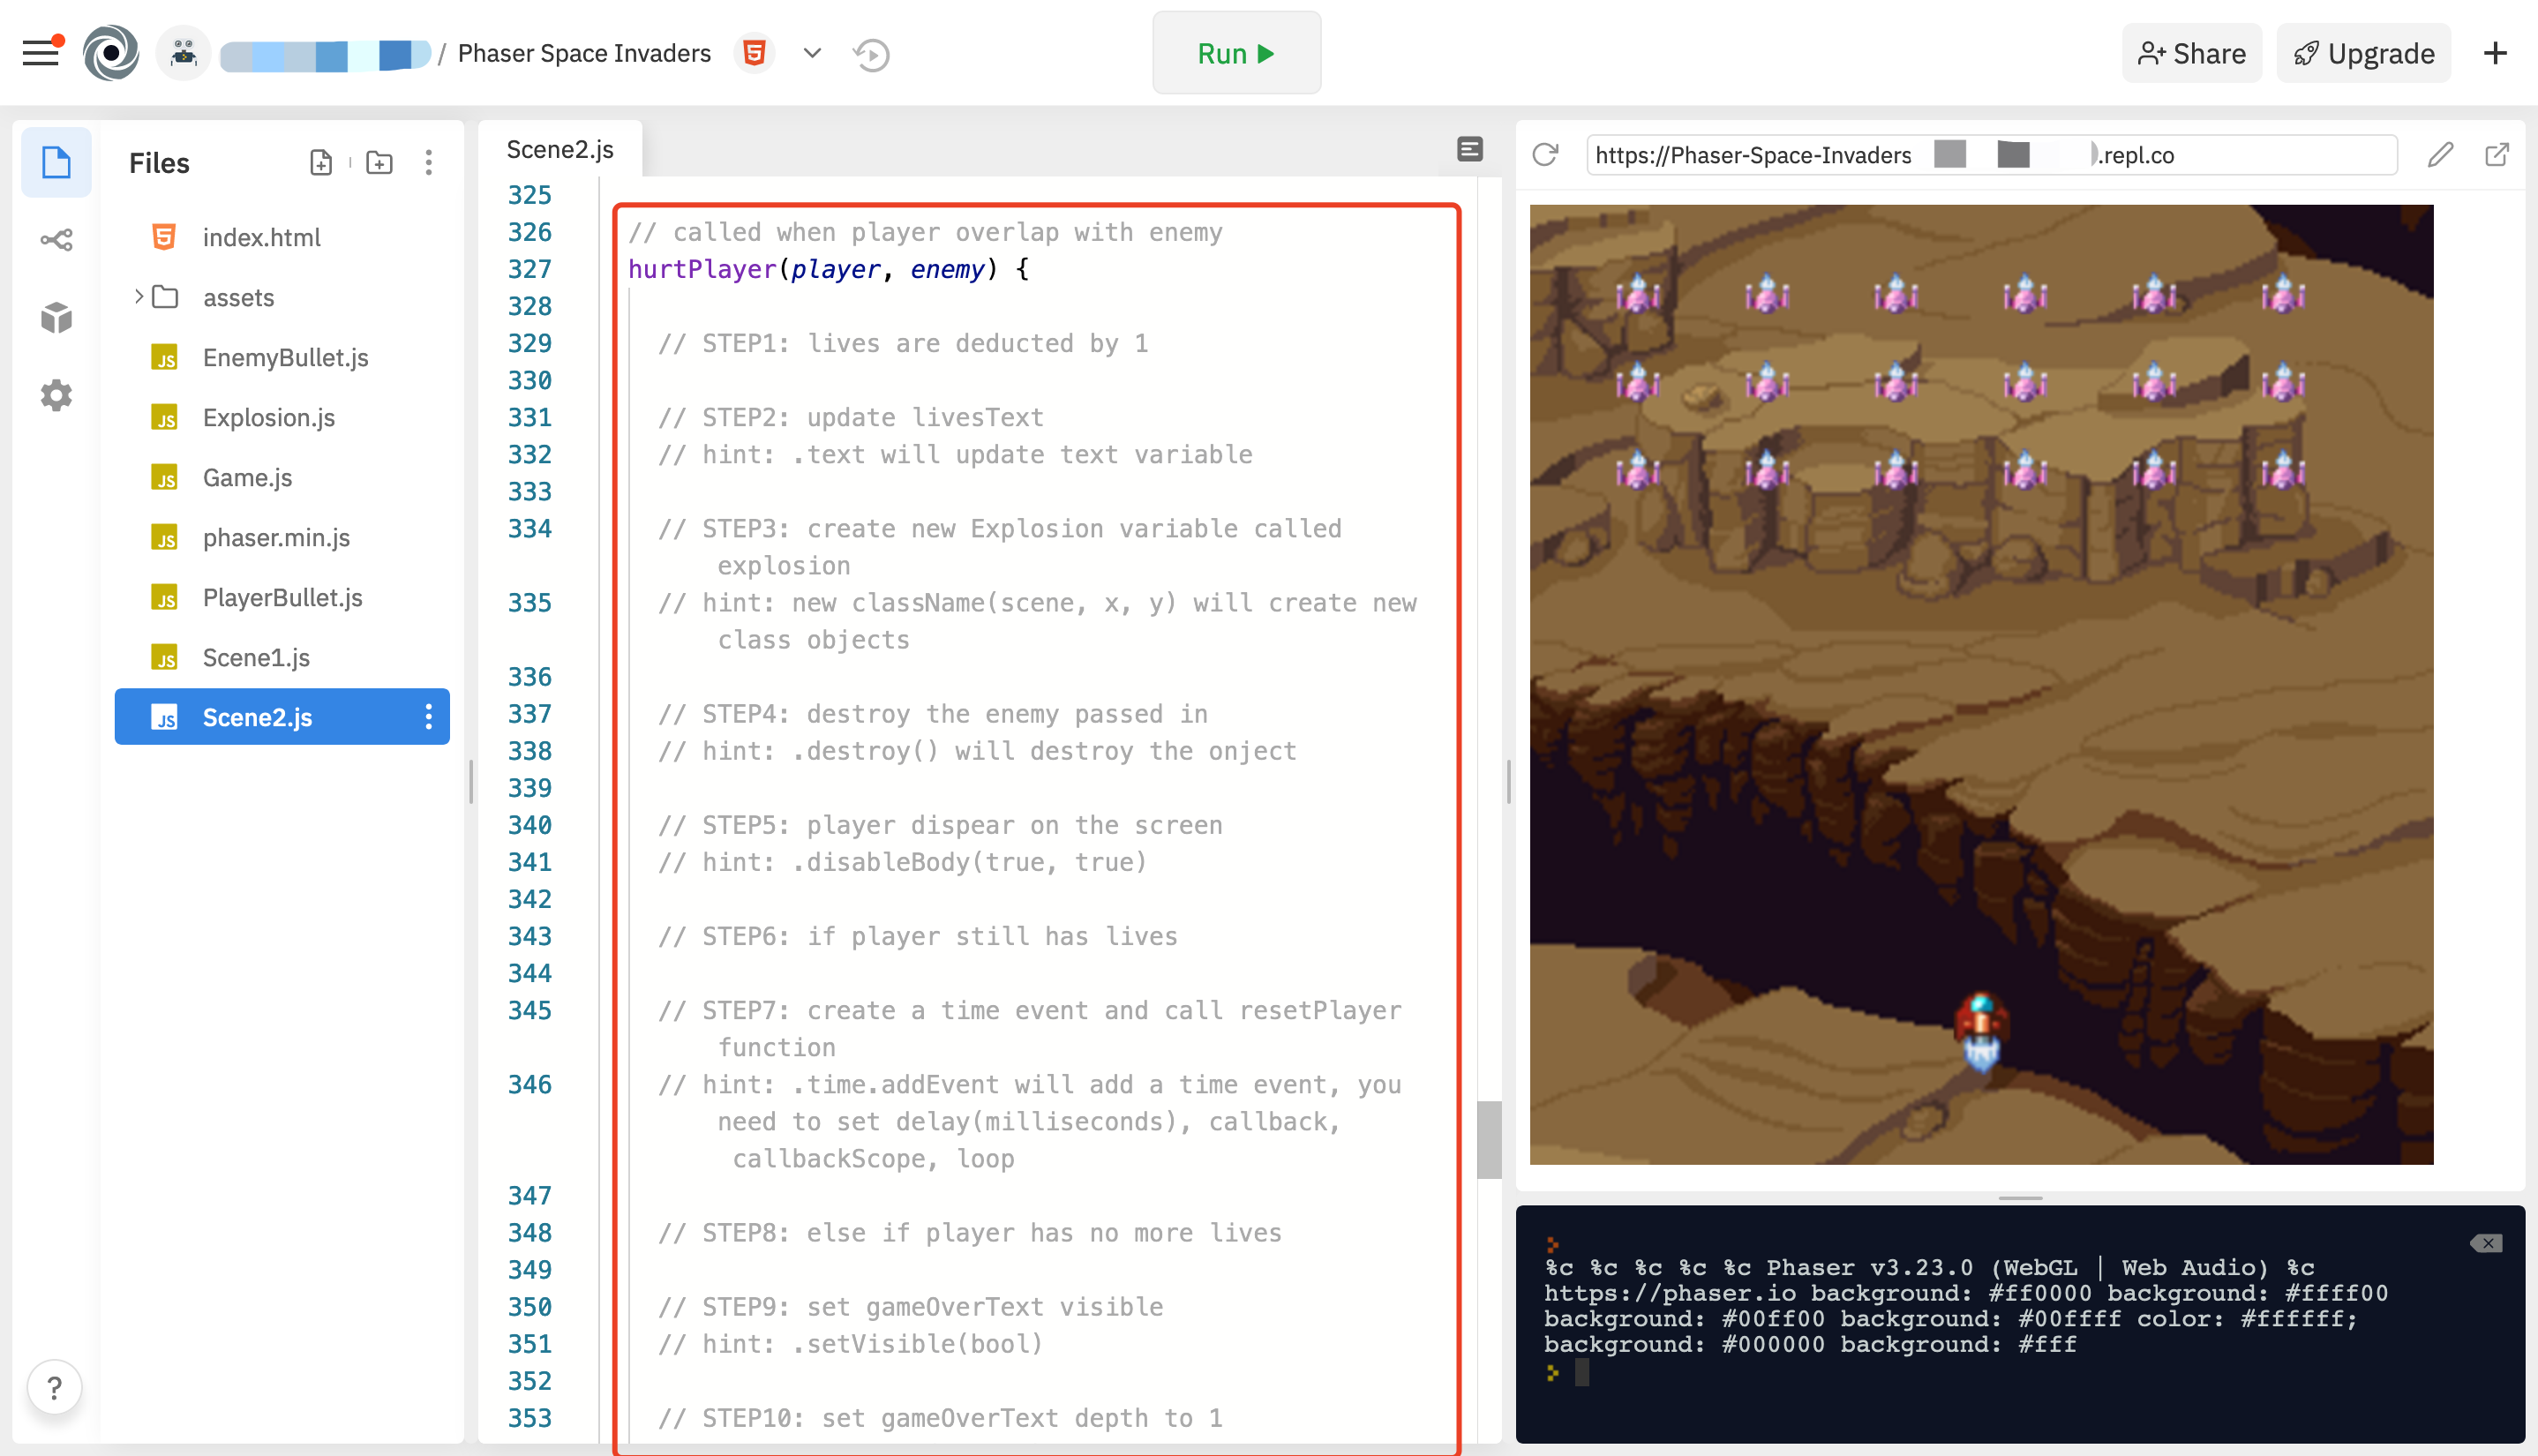
First we will destroy the enemy and disable the player for step 4 and 5 with these lines:
enemy.destroy();
player.disableBody(true, true);
This makes both the enemy and player disappear (the enemy has been deleted, but the player is just invisible and not interactive). Now let’s make the player revive after a short pause (the pause allows the player some time to react to the damage). For this pause, we will another timer (like we did for changing the enemy direction) by step 7. The syntax will be the same, but we will call the resetPlayer() function, have a shorter delay, and also not loop the timer.
Once you have the timer created, let’s work on the resetPlayer() method:
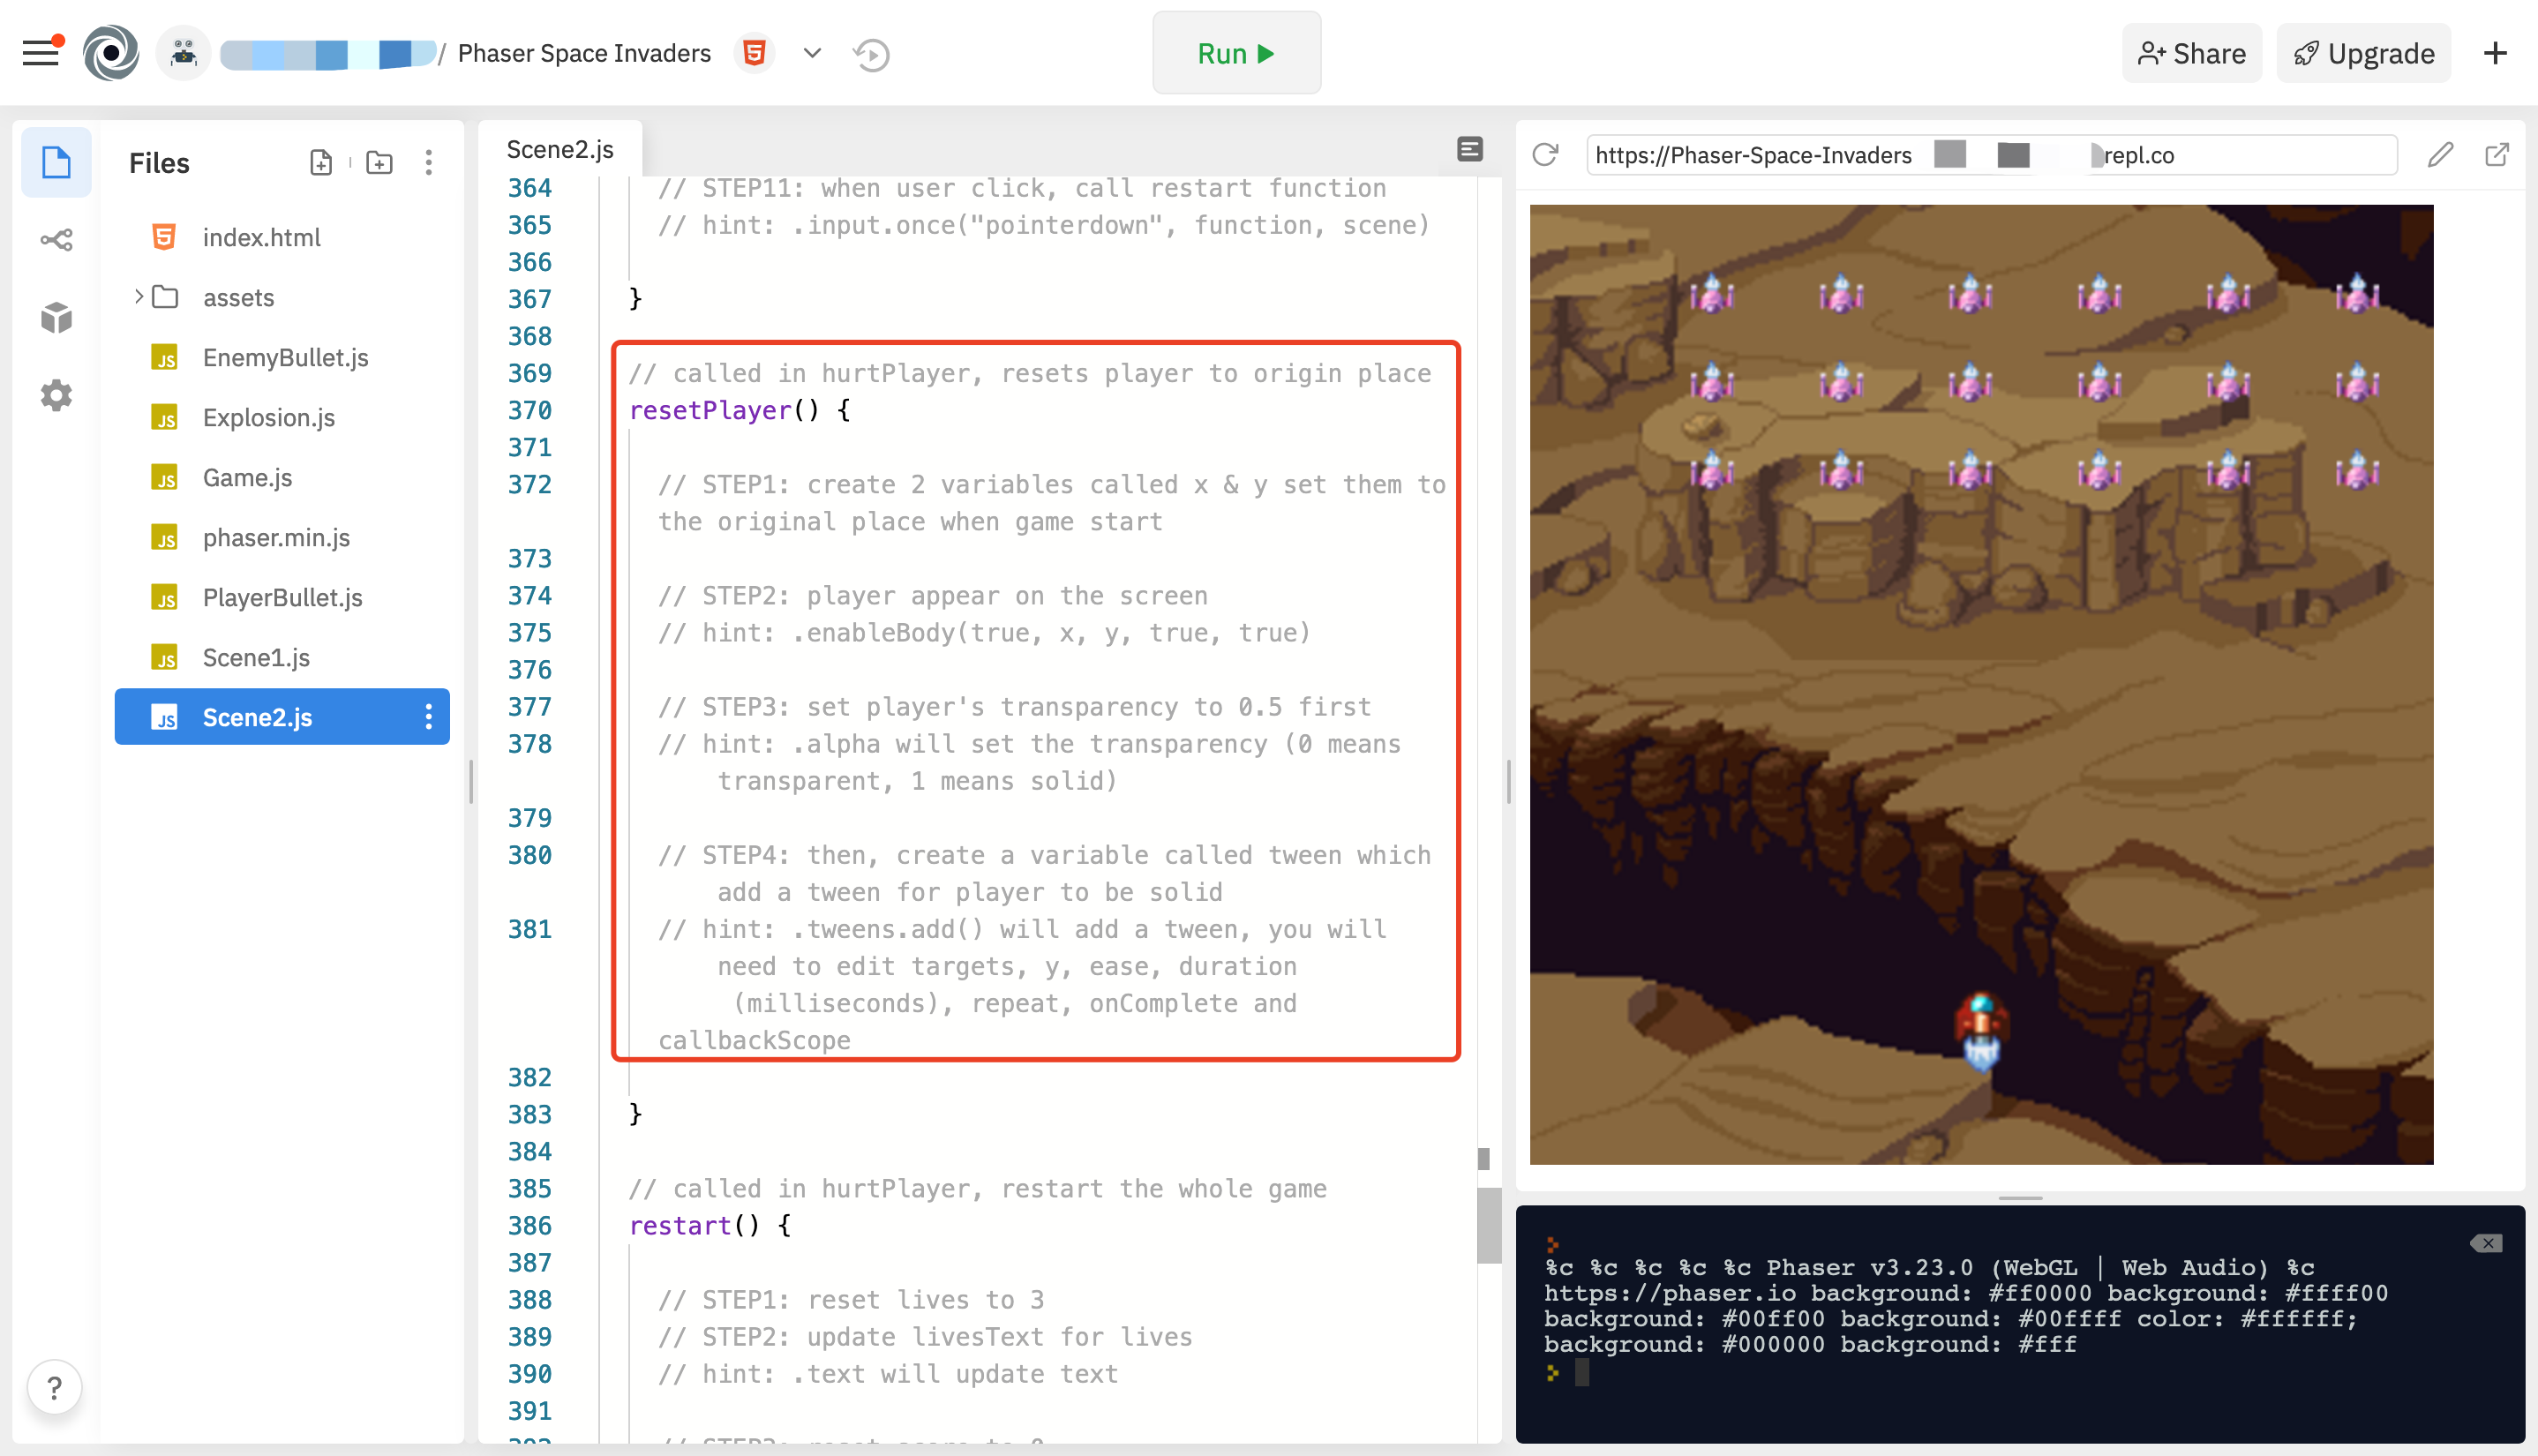
First, choose a respawn coordiate and change the player’s (X, Y) value to this location (we can still change the ship’s location like this because it still exists, it’s just disabled). Then, enable the player with this line:
this.player.enableBody(true, x, y, true, true);
Once you have implemented this, the collision should look like this:
Next, let’s create a new explosion object by editing explosion.js:
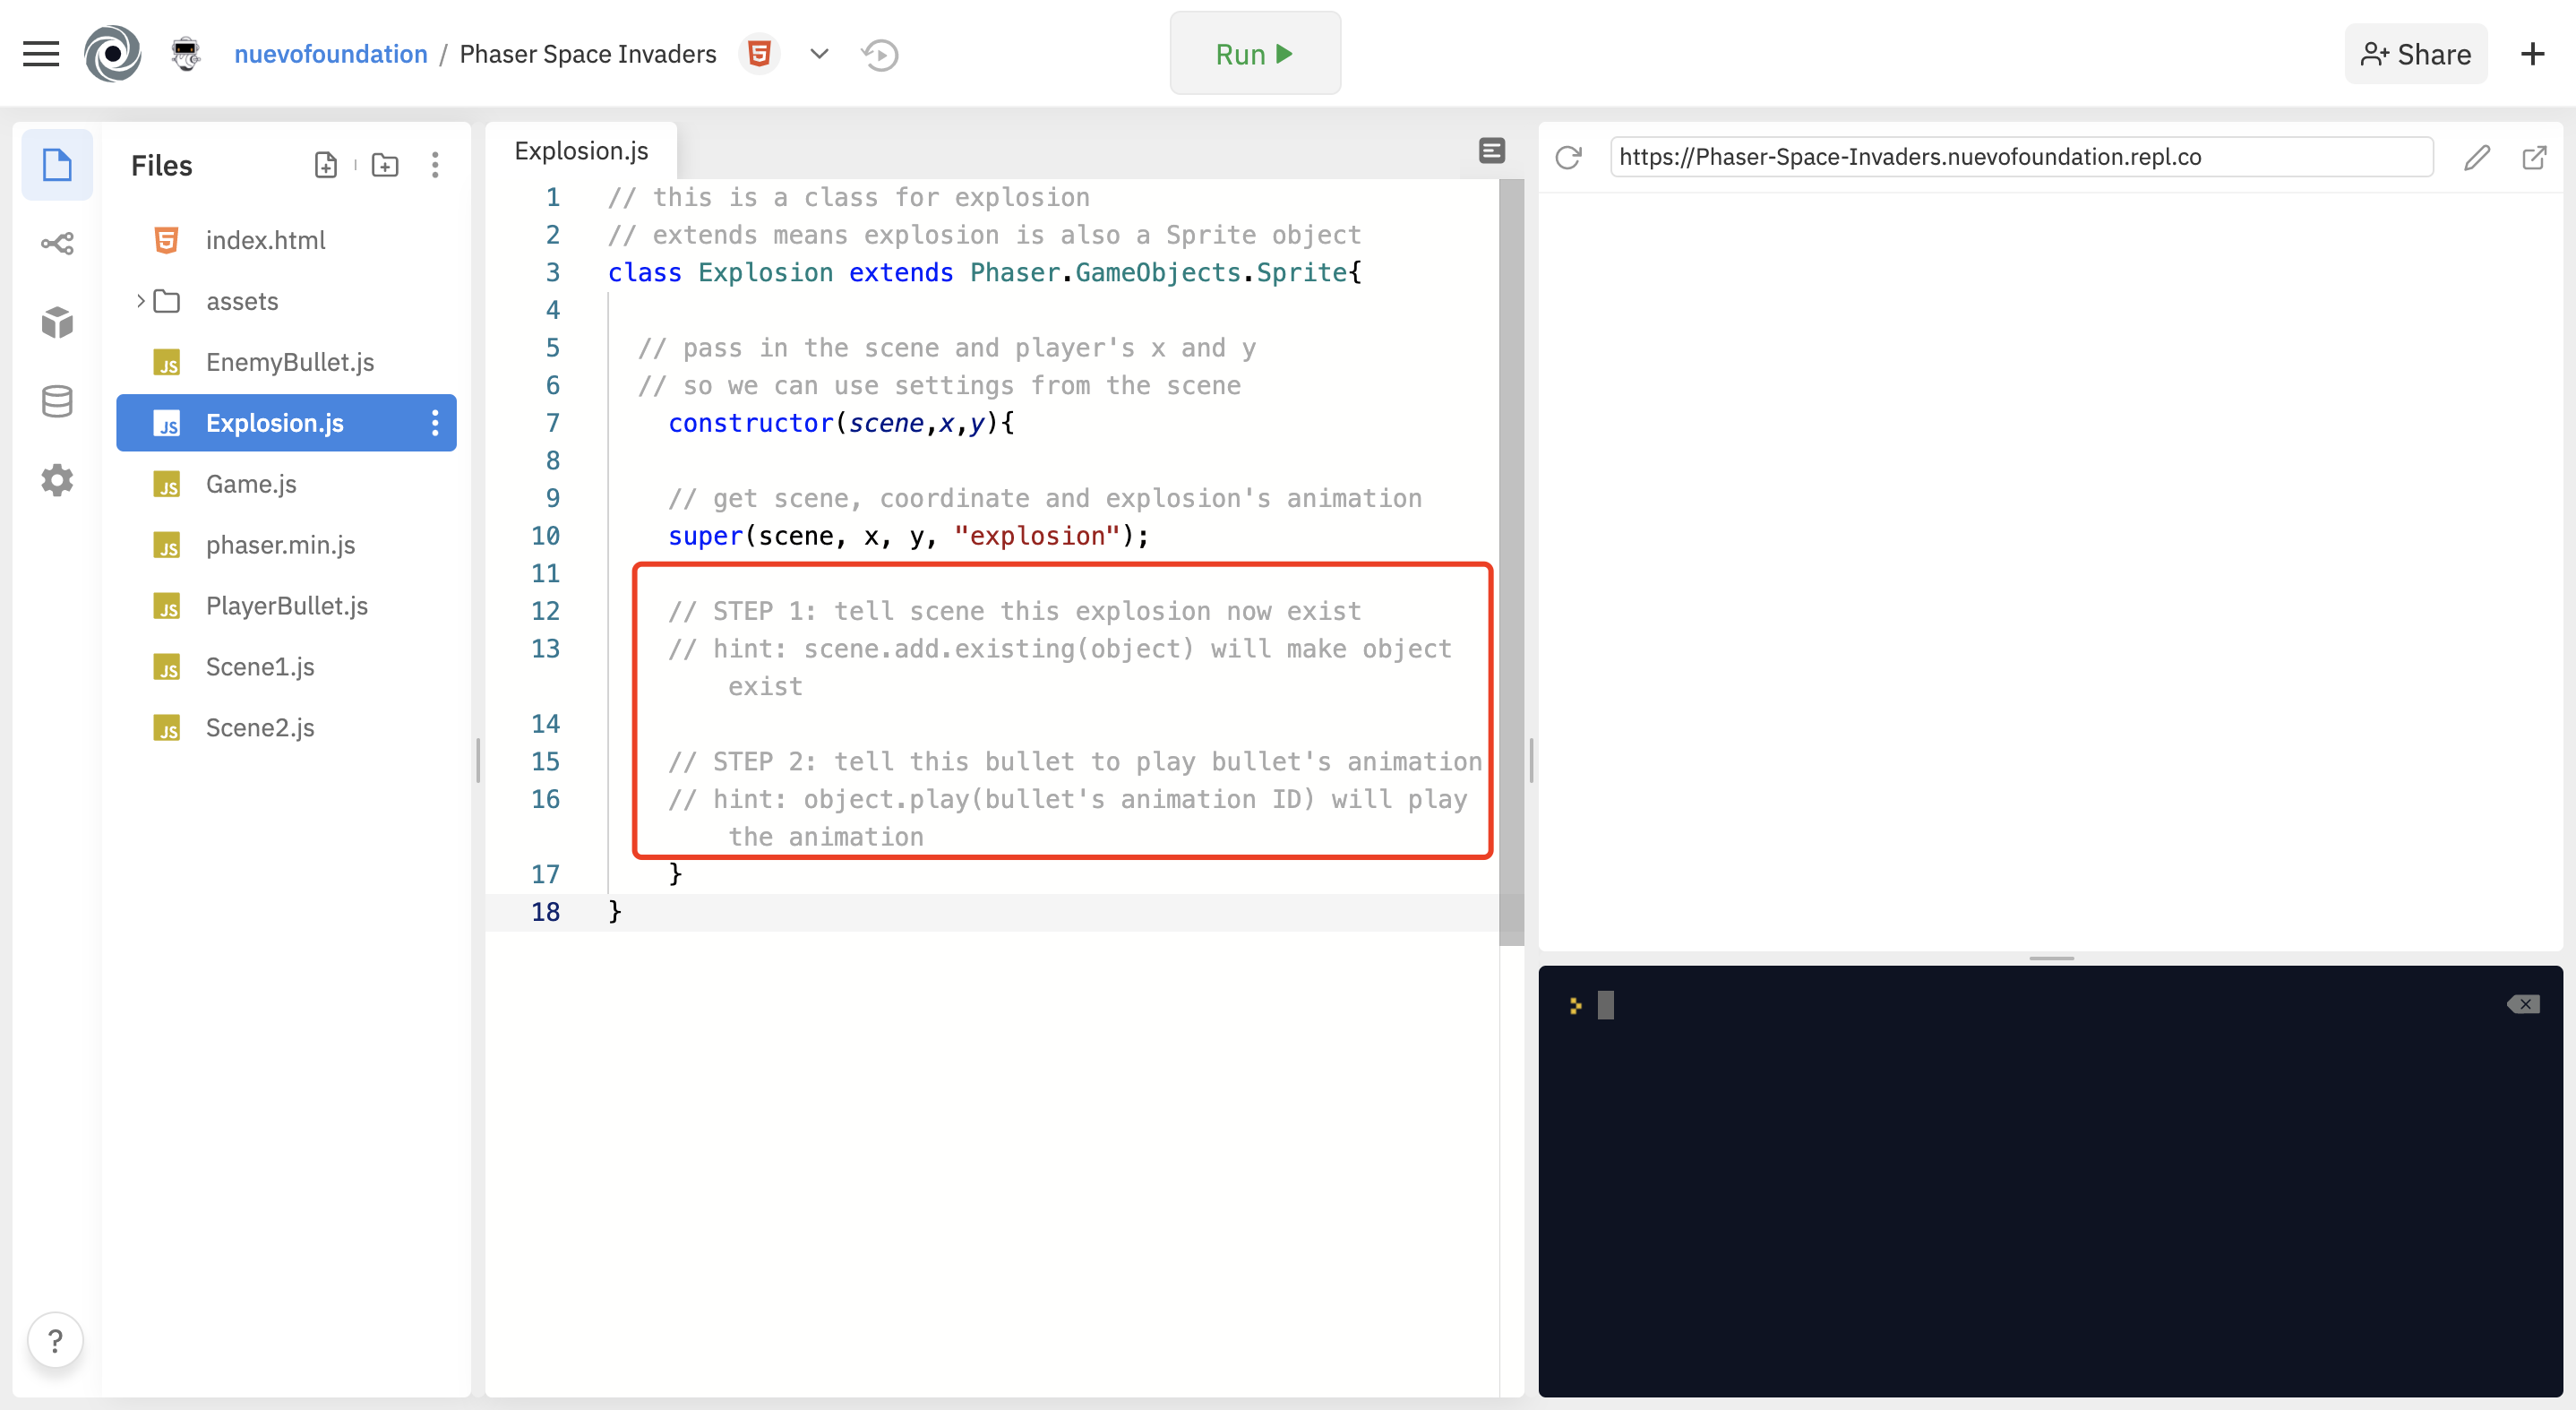
Notice that it extends Phaser.GameObjects.Sprite.This will allow us to use this Class’s constructor through inheritance. Our Projectile object’s parameter is simply just the scene and two numbers (x and y) - later you will see that we pass Scene 2 itself. We can use this scene to access everything within it. All this file will do is create an object that will play the explosion animation at the specified location. All the code this class needs is contained within the constructor, and there are only 2 lines of code that you need to fill in.
Now, go to the hurtPlayer() method in scene2.js:
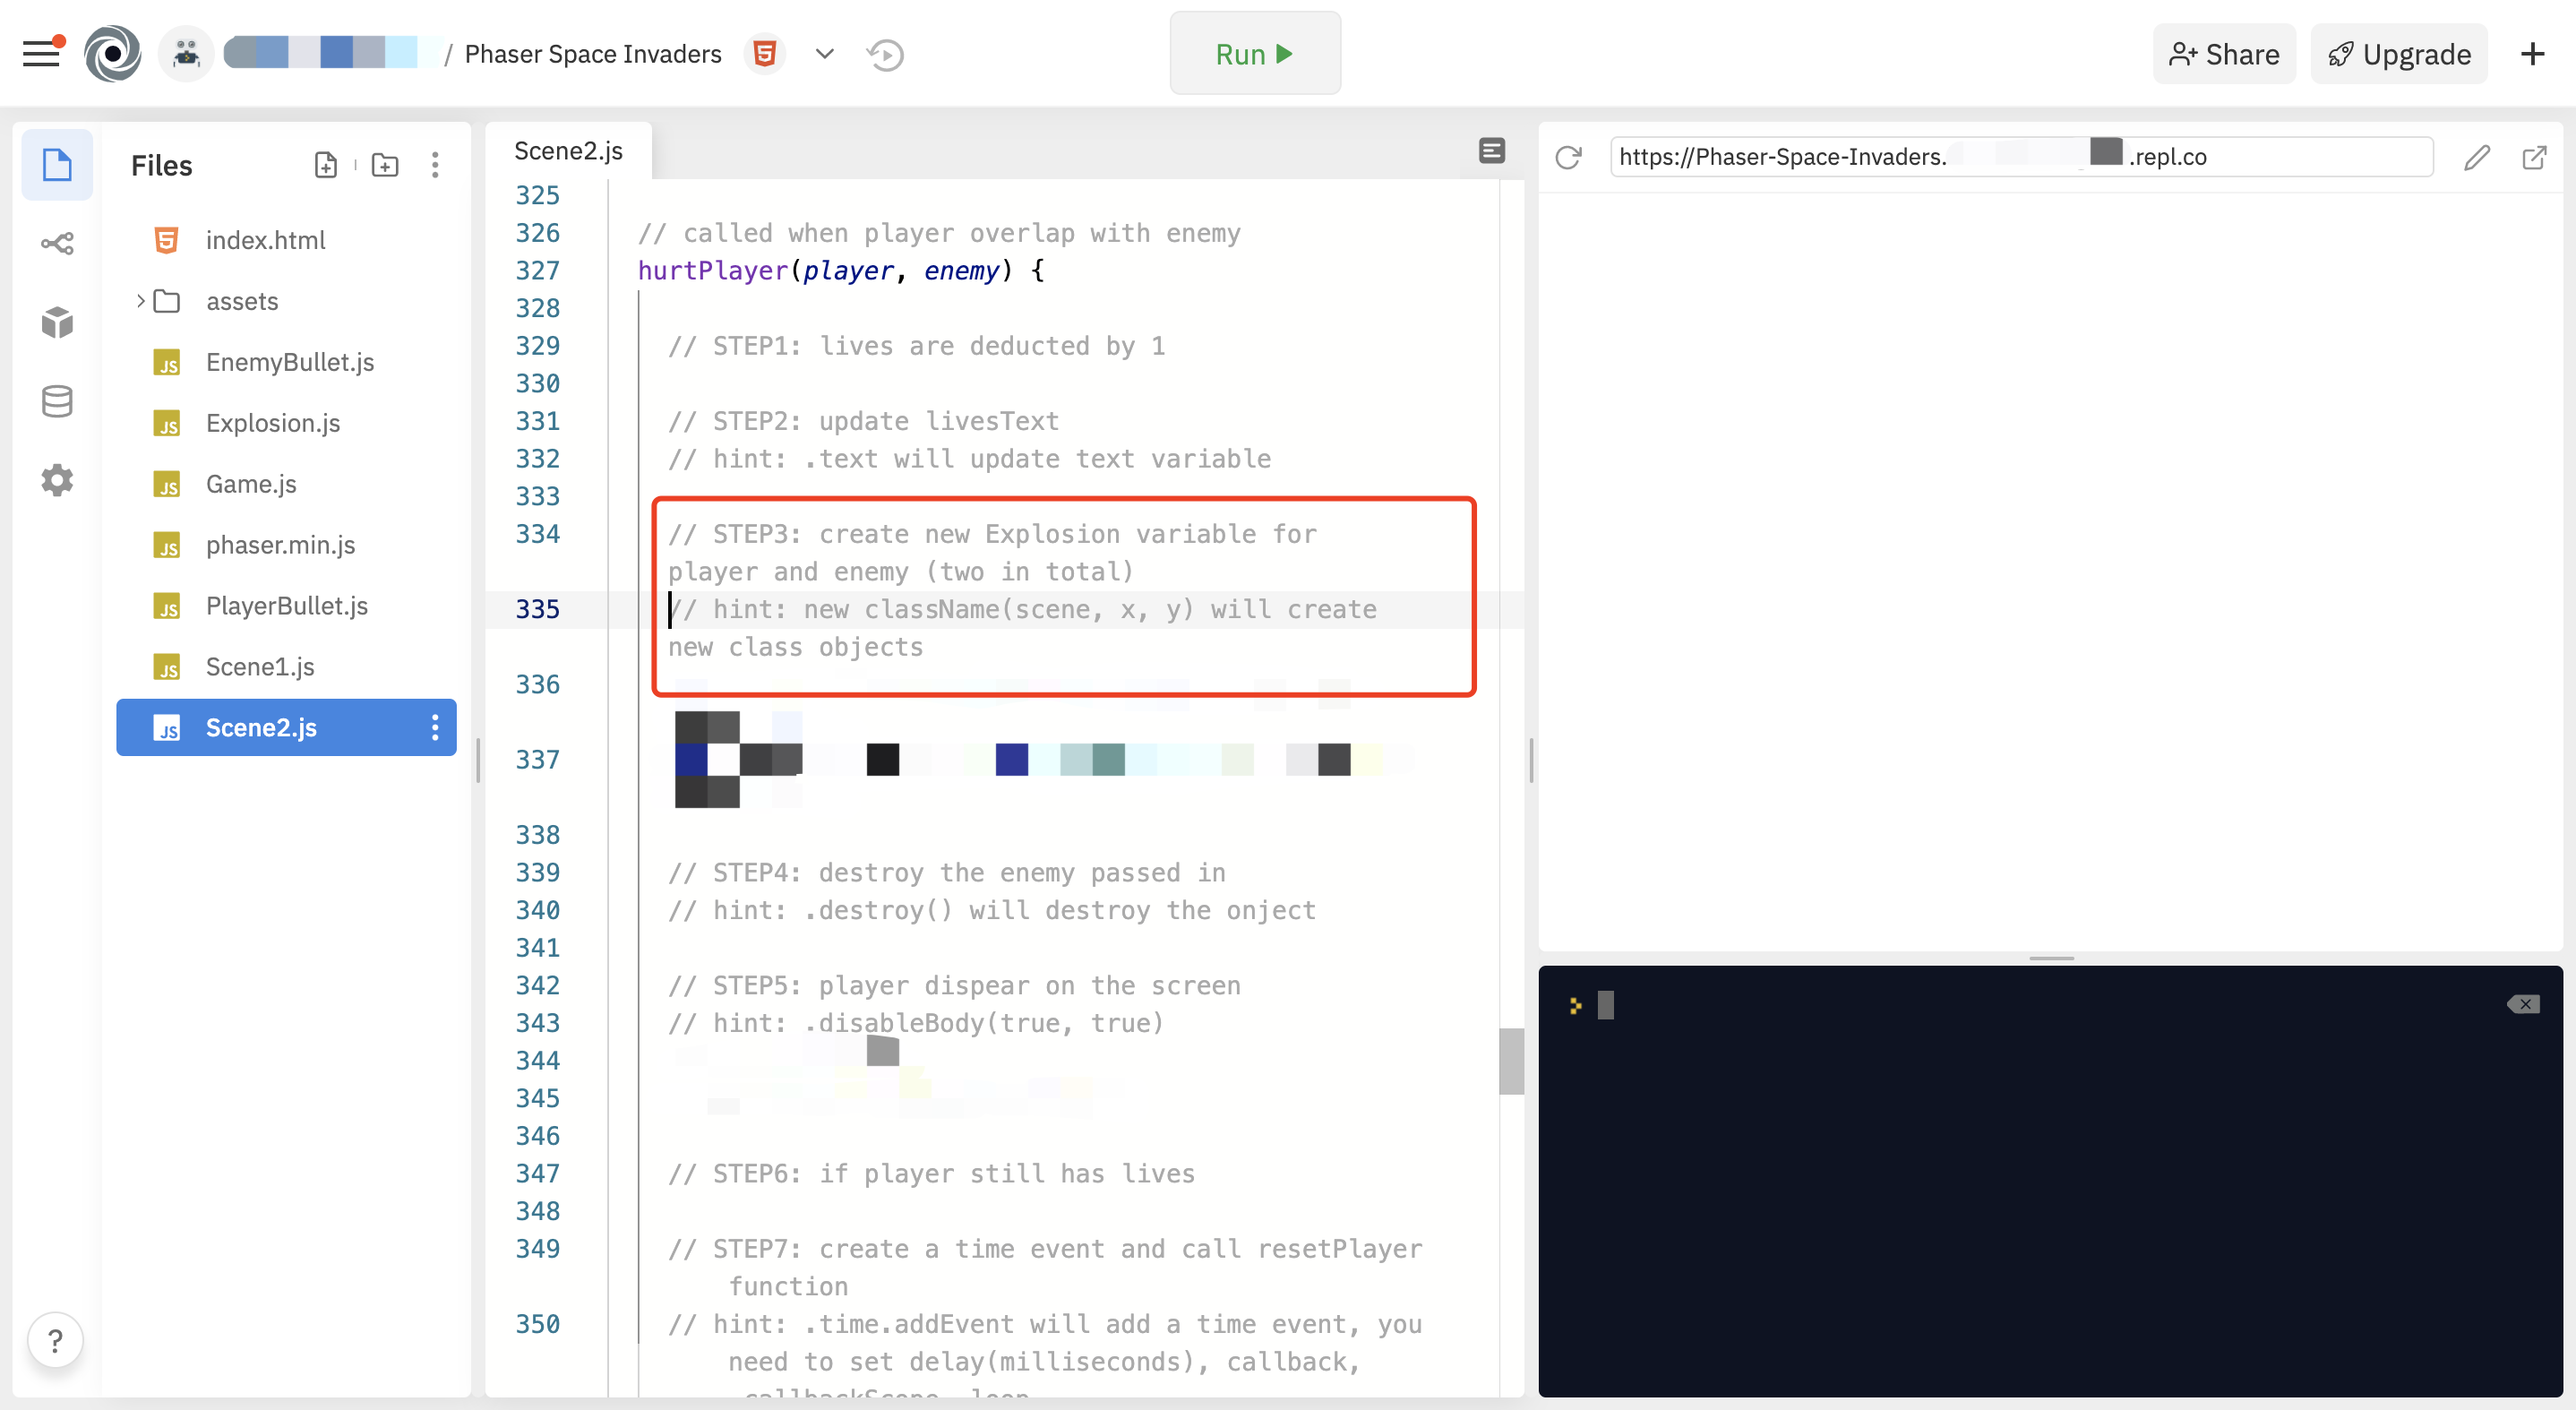
You will create two explosion objects:
- One with the scene and player coordinates as parameters,
- The other with the scene and enemy coordinates as parameters.
Next, notice how the player’s revival is a bit sudden. We will make this transition smoother with a tween after we spawn the player:
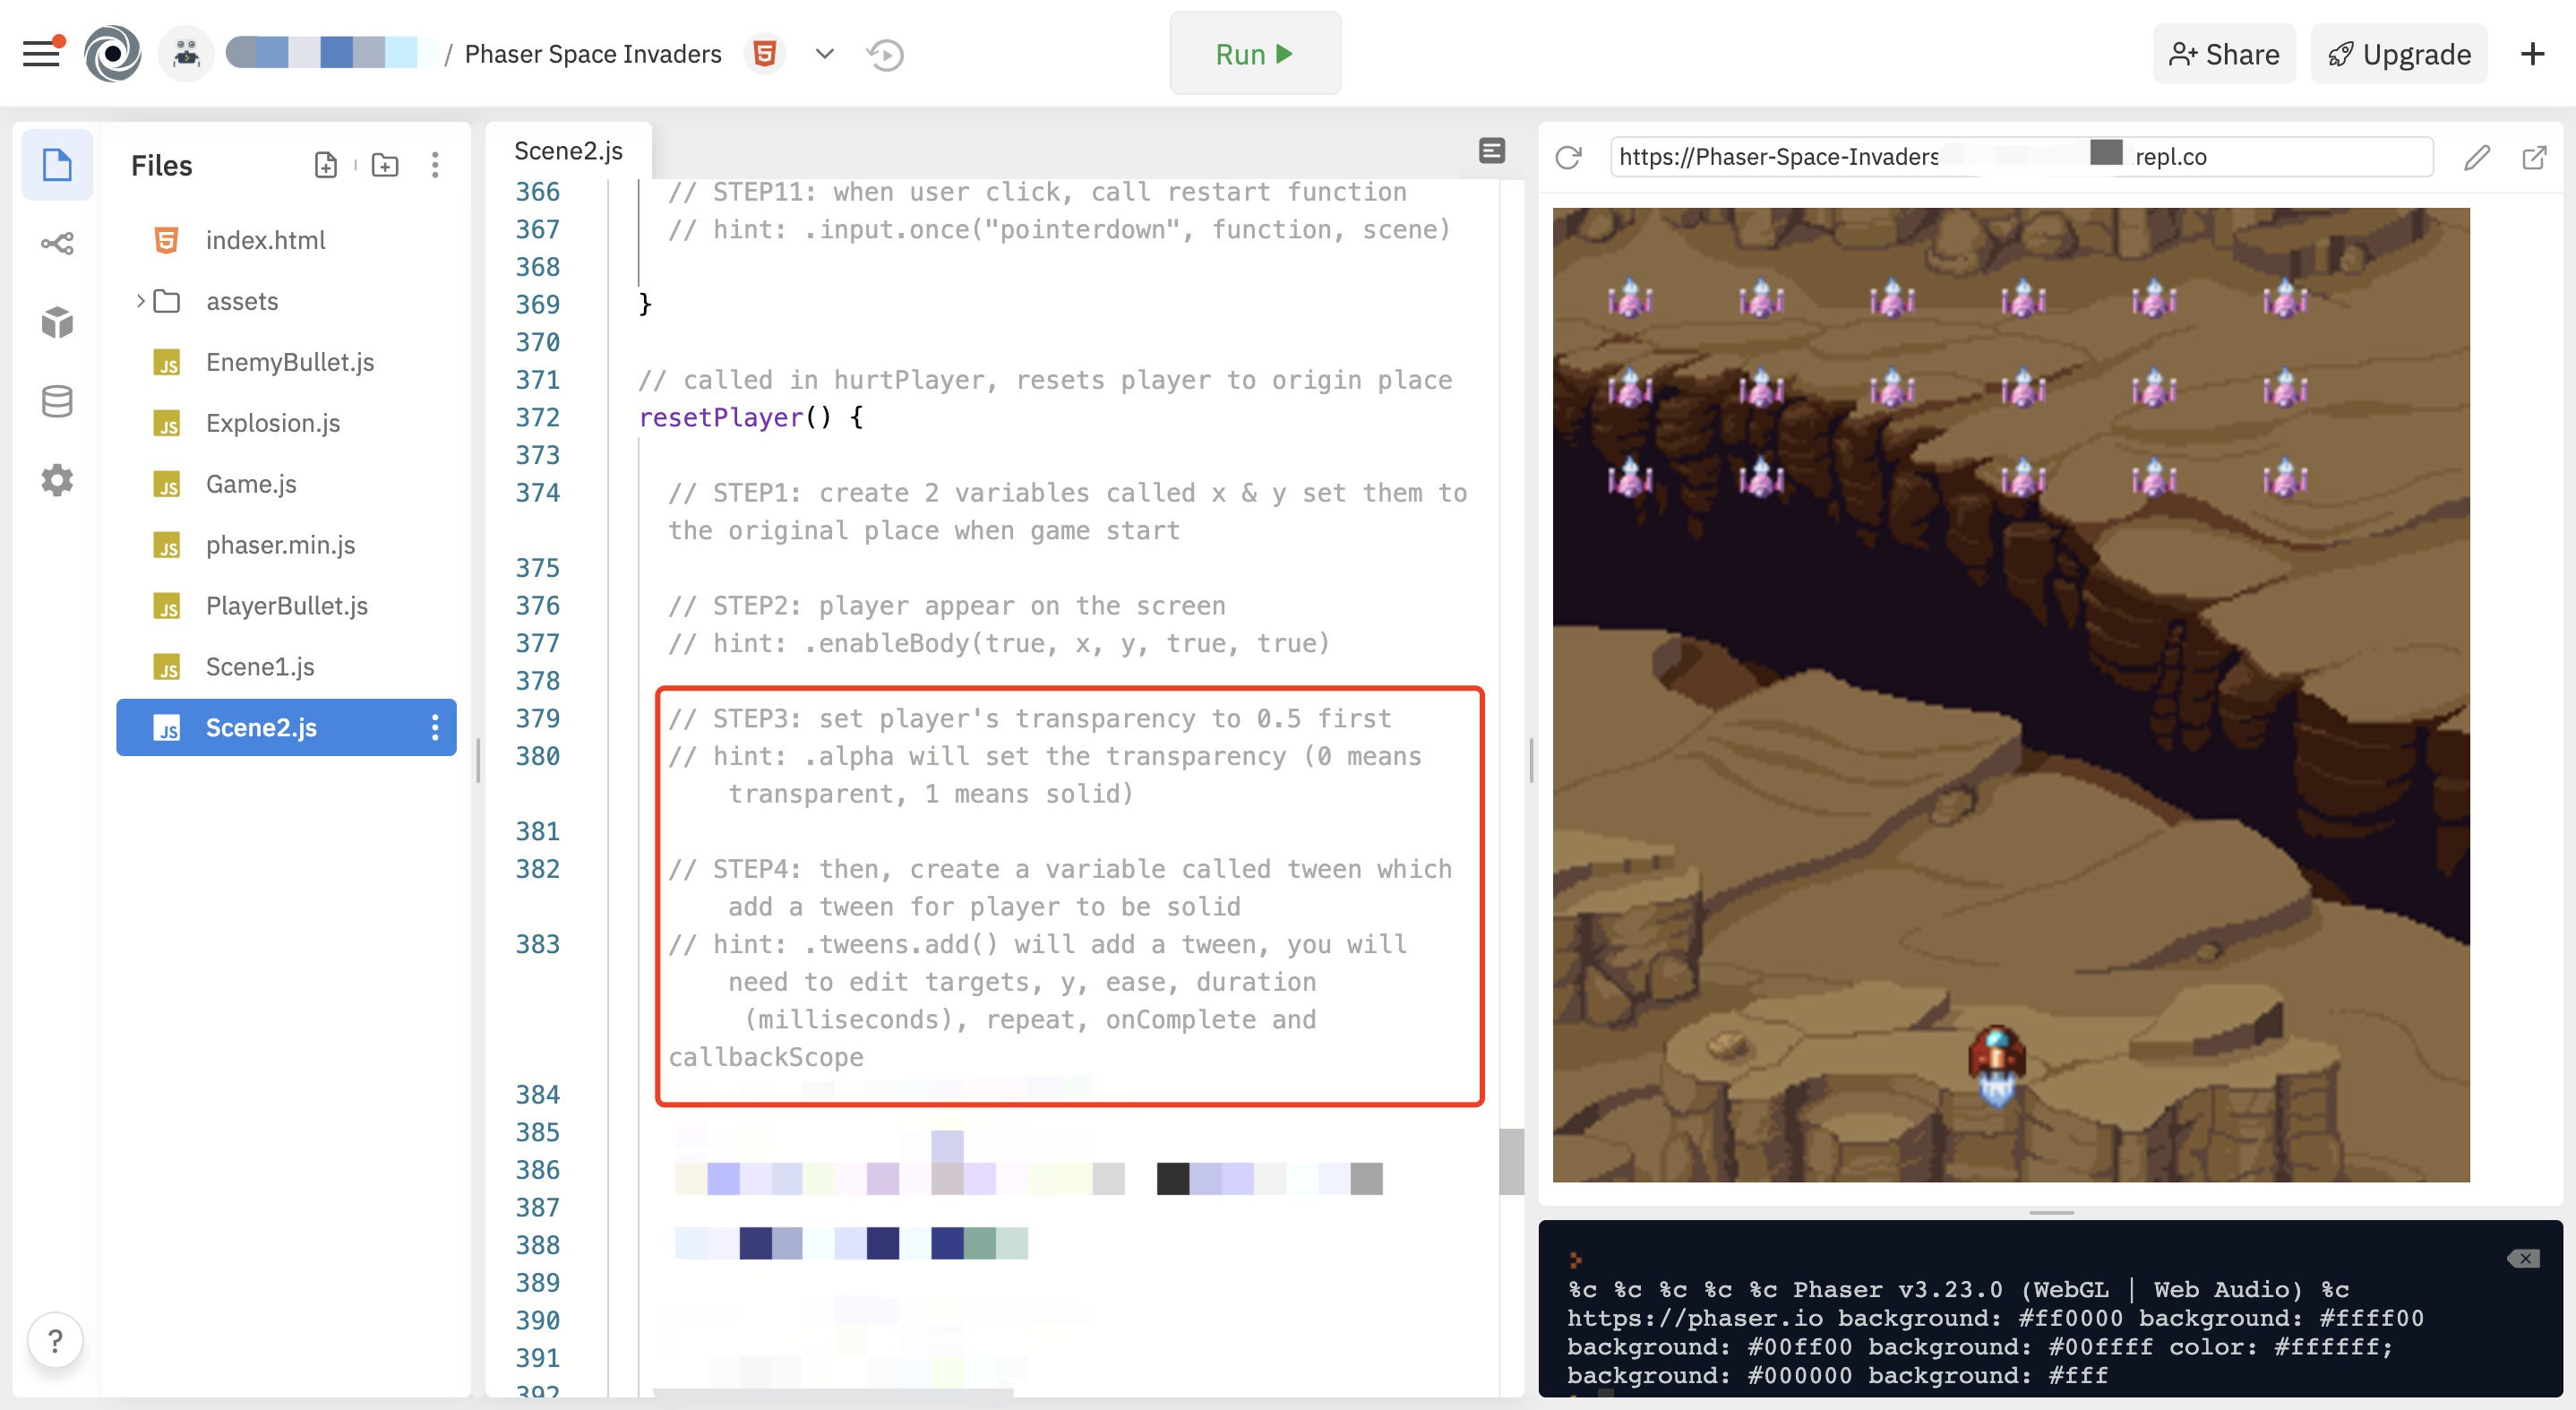
A tween is essentially a tool that lets you animate a feature or characteristic of an object. For example, in this case, we are animating the player’s alpha (aka visibility). We will begin by setting the player’s alpha to 0.5 and then using the tween to animate it to full, normal visibility.
var tween = this.tweens.add({
    targets: this.player,
    y: config.height - 64,
    ease: 'Power1',
    duration: 1500,
    repeat: 0,
    onComplete: function(){
        this.player.alpha = 1;
    },
    callbackScope: this
});
Now we’re finally done! Now our player revival animation looks much cleaner!
