Now, let’s make some enemies for our player to fight! Let’s first load a sprite sheet for our enemies in Scene 1 just like we did for the player. Use the same syntax you used to load in the player, but use a different name, assets/enemies.png as the source of the sprite sheet, and a frameWidth and frameHeight of 16:
In addition, create another animation in Scene 1 in the same way you created the player’s animation (you can use the same arguments for frameRate and repeat, but remember to use enemies for frames:
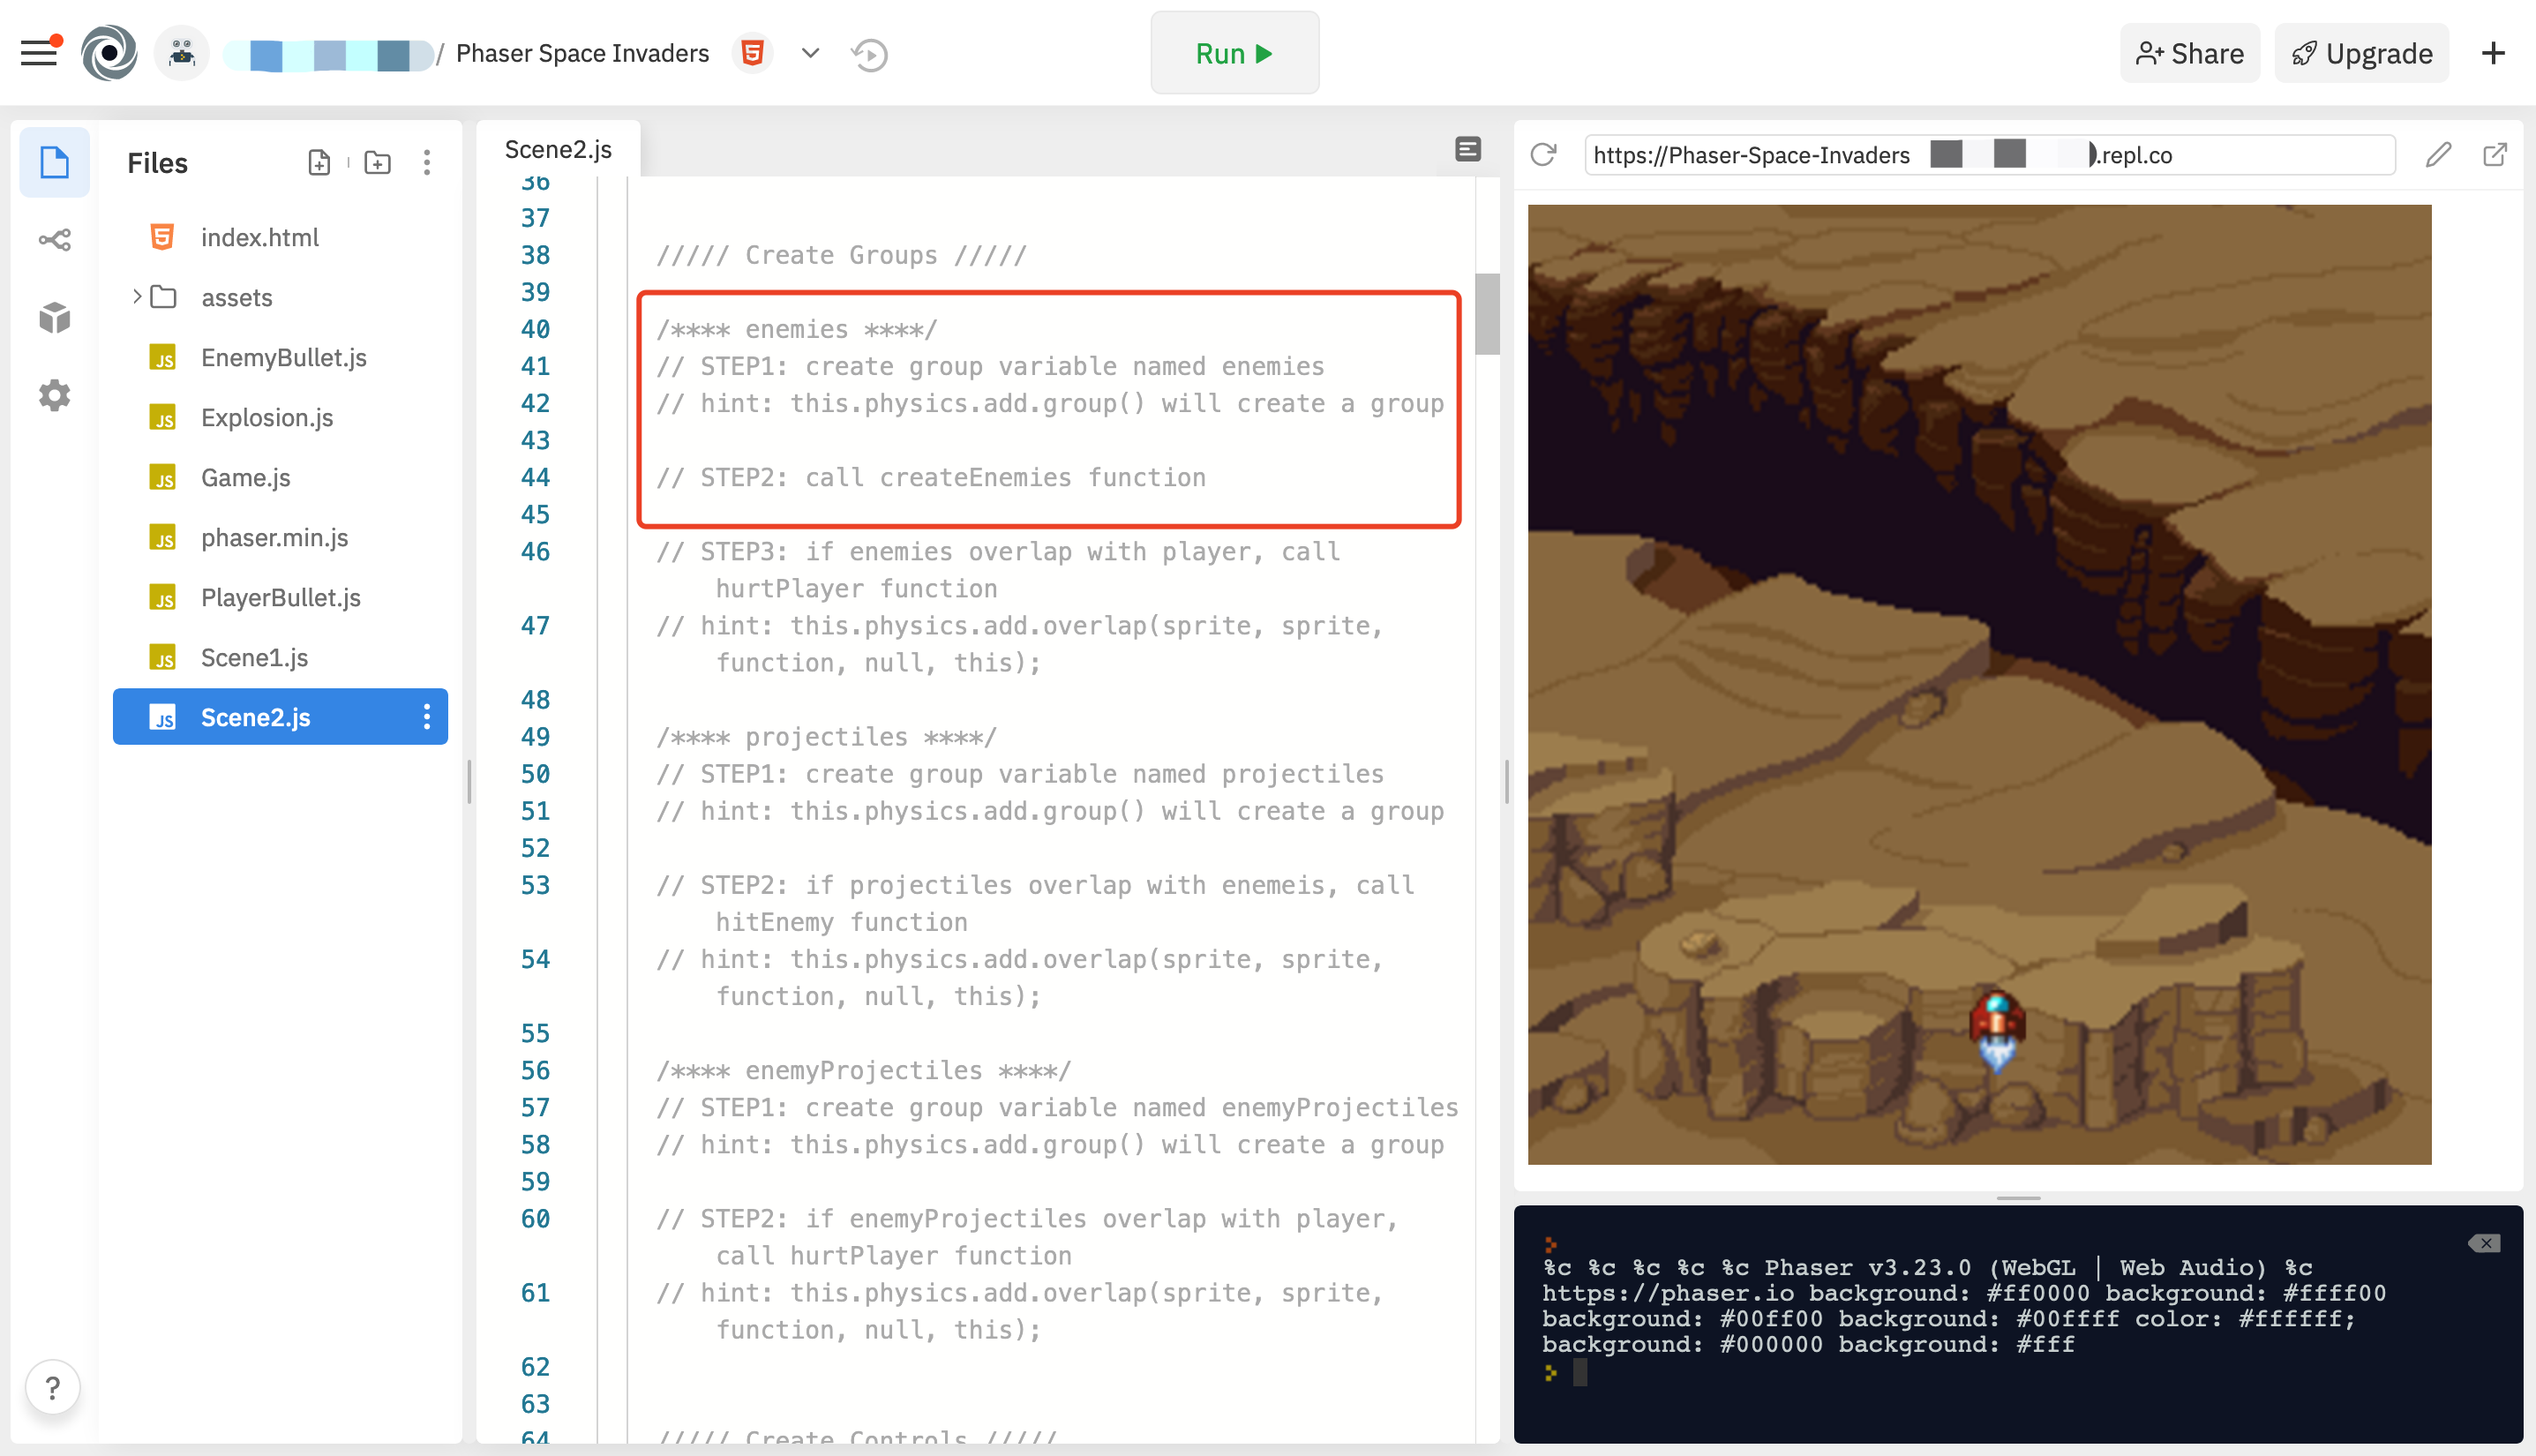
This game will use many enemies that look identical and behave very similarly. To make this coding easier, we will use a concept in Phaser called a group to control all of our enemies at once A group is exactly what it sounds - a group of things. We can reference this group when we want a change to be made to every member of it.
We declare our enemy group like this:
this.enemies = this.physics.add.group();
This will create a group called enemies.
Now, let’s place our enemies onto the screen. To make this easier, we will use another helper method called createEnemies() (which again, has already been made for you with nothing inside of it):
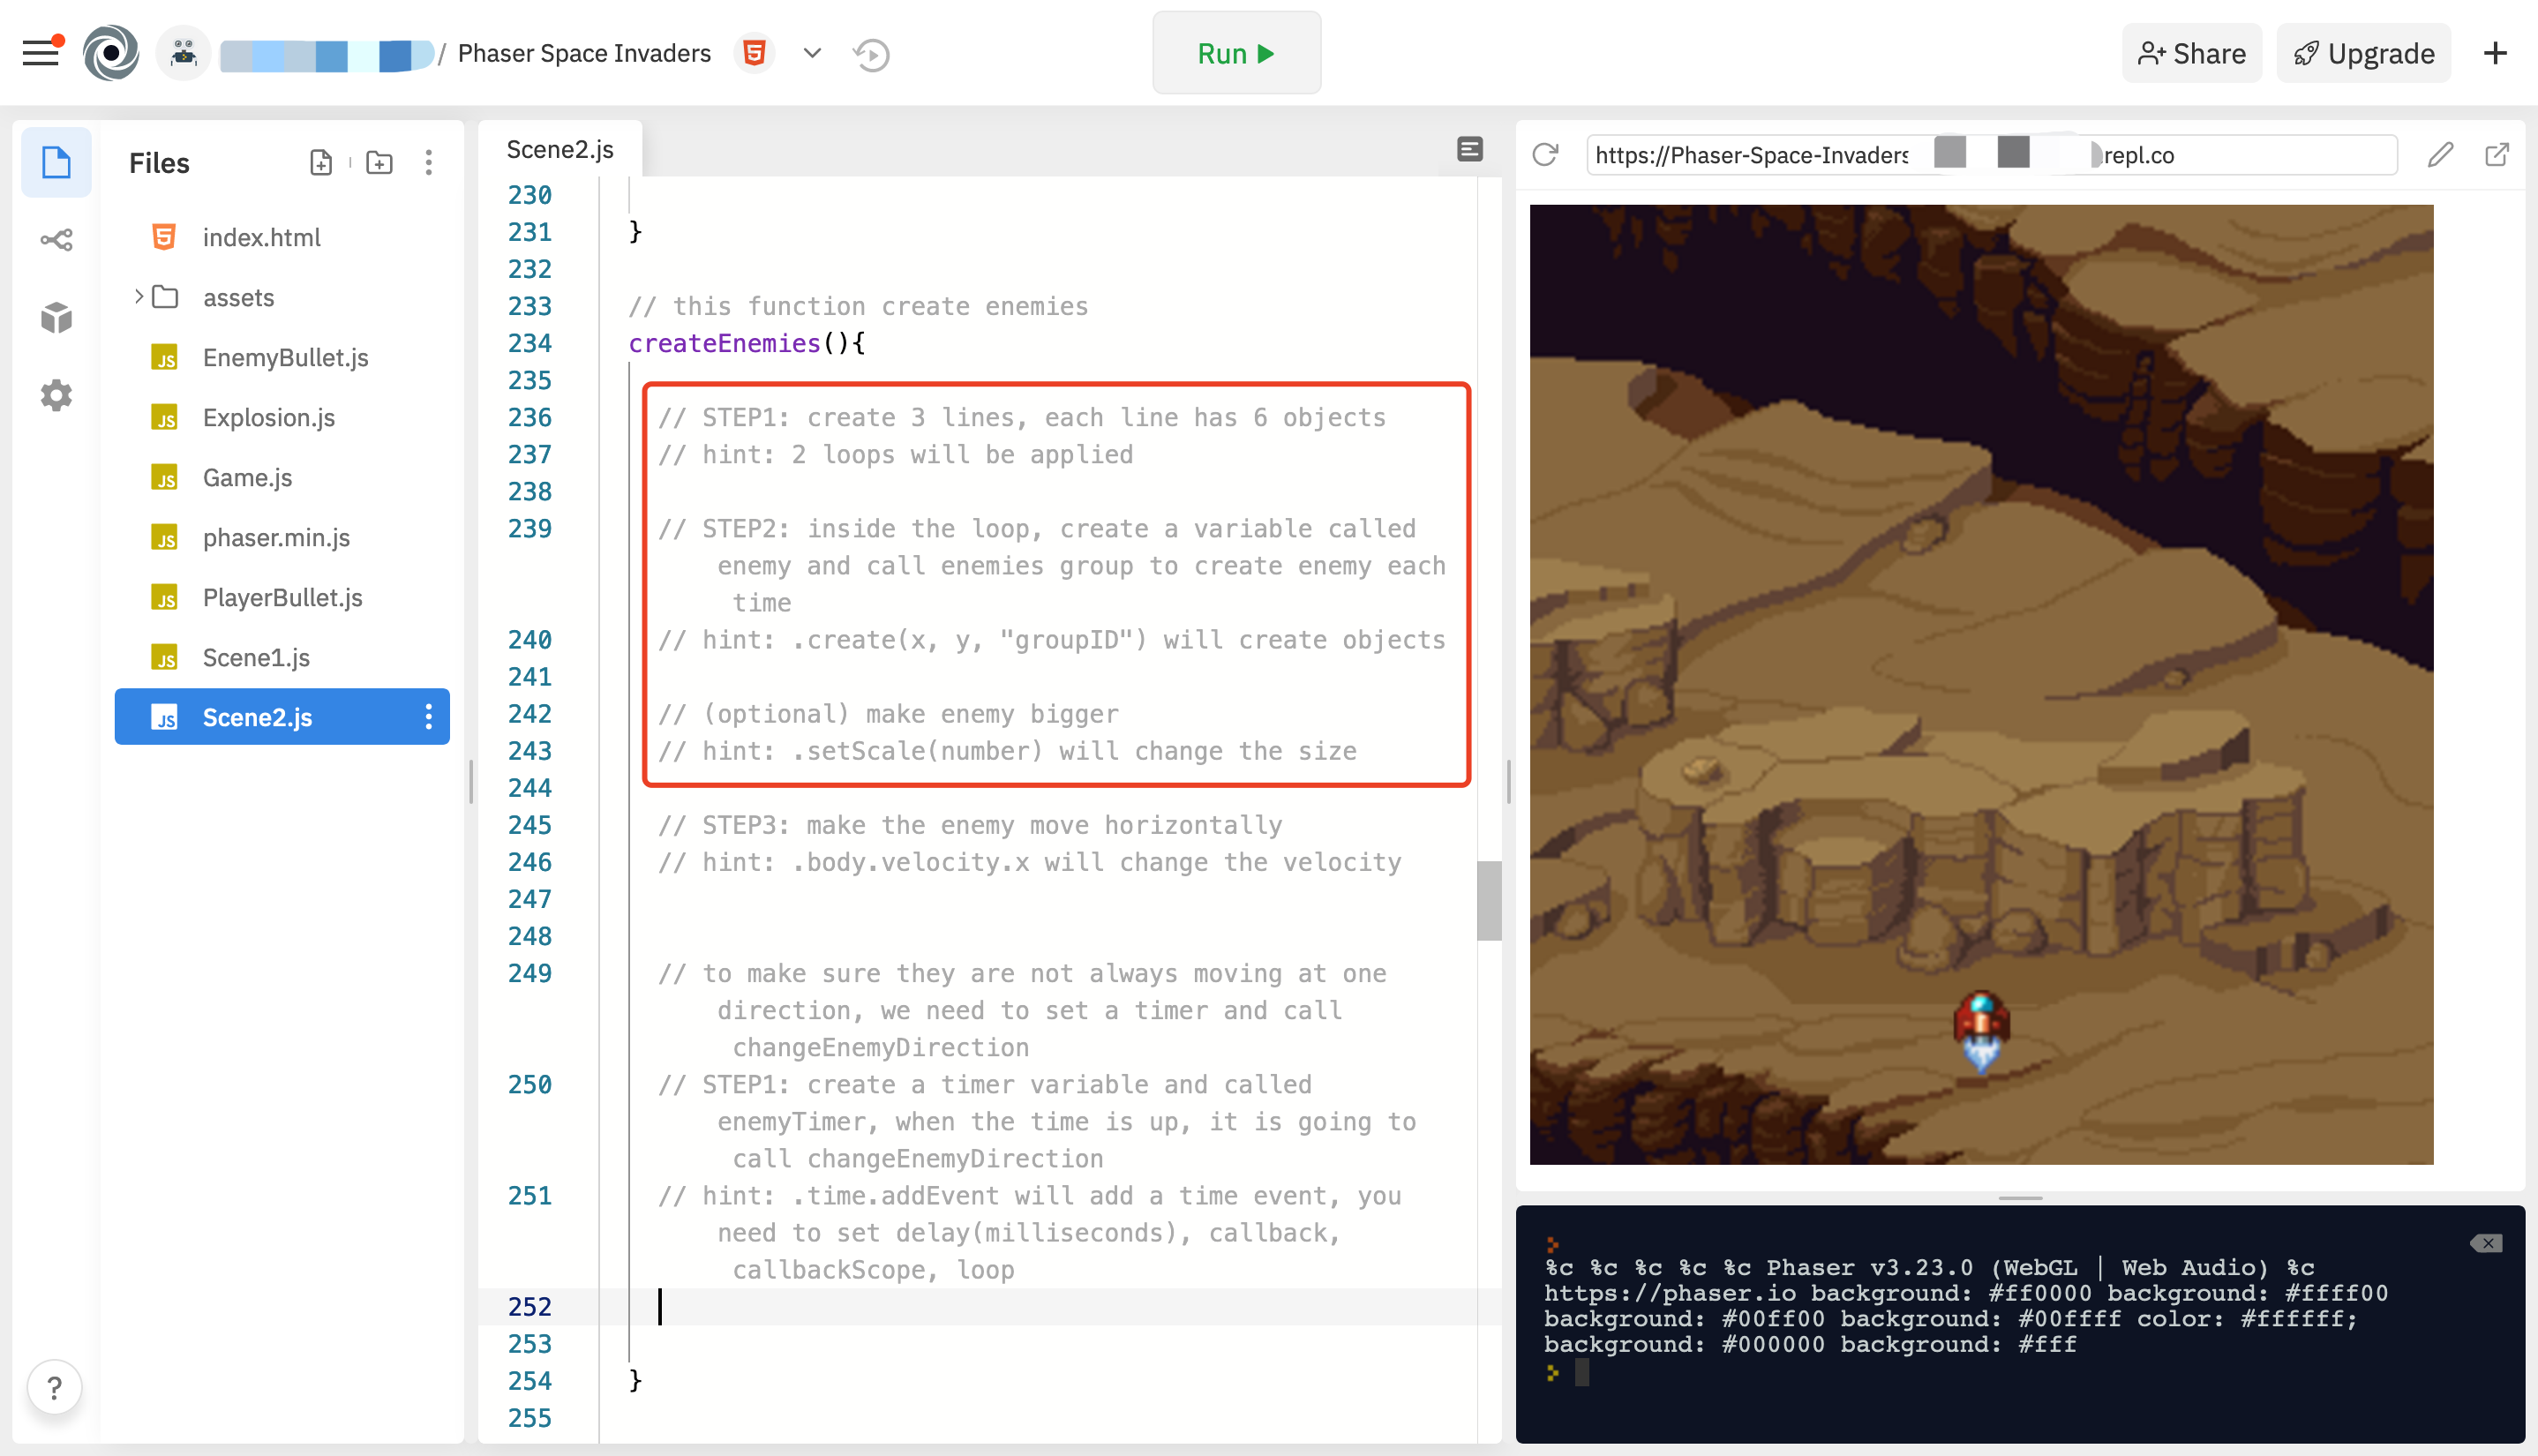
Now, call this method in the create() method instead of the update() method like we did for the player movement because we only want to spawn the enemy once at the beginning of the game:
The syntax for creating an enemy variable “enemy” at coordinate (X, Y), with the enemies sprite sheet, and within the enemies group that you declared earlier looks like this:
var enemies = this.enemies.create(X, Y, 'enemies');
Activity 1: Placing an Enemy
Try it out by choosing an (X, Y) coordinate and placing this line of code in the createEnemies() method. You will also need to play the animation right after you create the enemy (so it will be in the createEnemies() method).
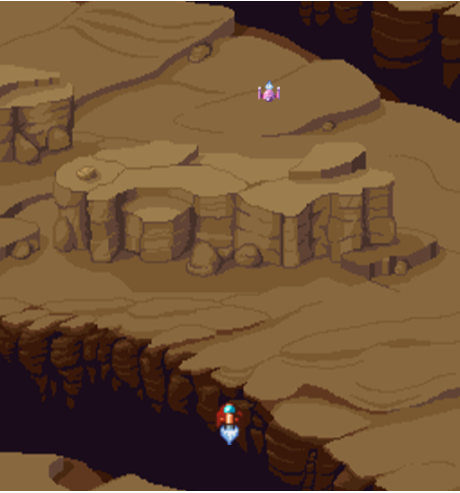 It should look something like this (with potentially a different location - this enemy was placed on (300, 100))
Activity 2: Placing more Enemies
Now let’s add some more enemies. Add a couple new enemies in the same method, but be careful because every enemy variable you make within the same scope must have a different variable name.
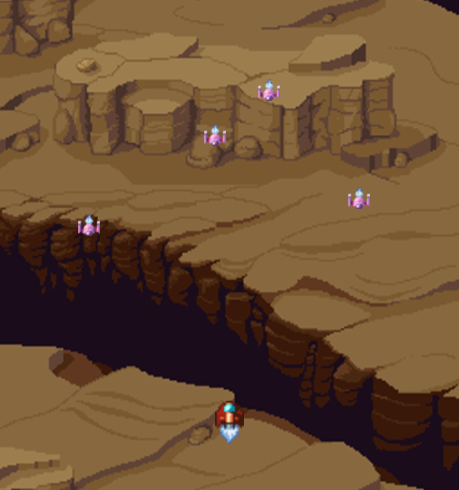
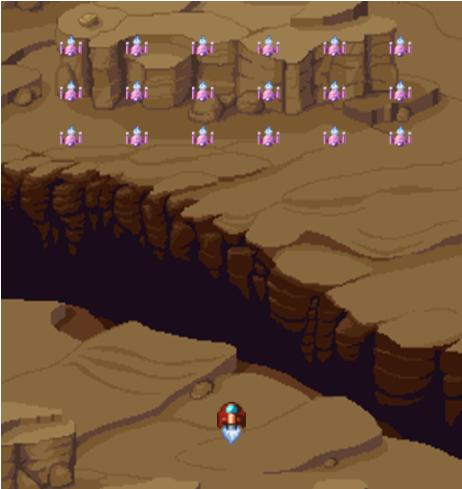
Activity 3: Placing a Block of Enemies
Now that you’ve gotten the hang of it, let’s try something a bit challenging and create the enemies in this block pattern shown below. However, there is one catch: do so WITHOUT declaring each enemy with an individual line.
HINT: use a nested for-loop