Android Setup
Follow the steps below to get Android Studio installed on your computer. If you already have Android Studio installed, open it up and skip to the next step!
These steps have examples for installing on Windows computers. However, the steps are similar for other types of computers as well.
Download and Install Android Studio
- Download Android Studio for your operating system.
- Follow these steps to install Android Studio.
Set the JAVA_HOME environment variable
Android Studio comes with a version of Java needed for certain parts of the application to run. Follow the steps below to set the JAVA_HOME environment variable on your computer, which tells these tools where to find Java:
- In the search box on the bottom left of the screen, type in
env. - Select the “Best Match” program
Edit the system environment variables.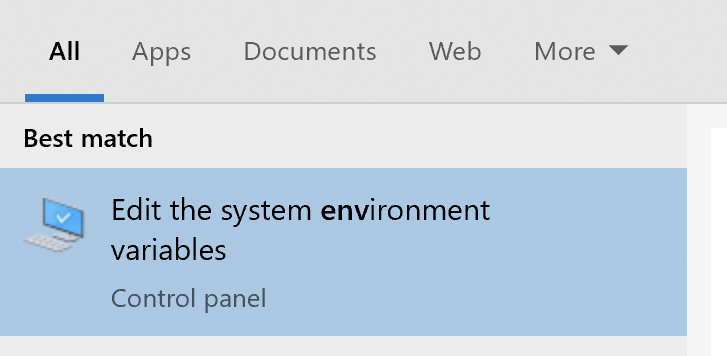
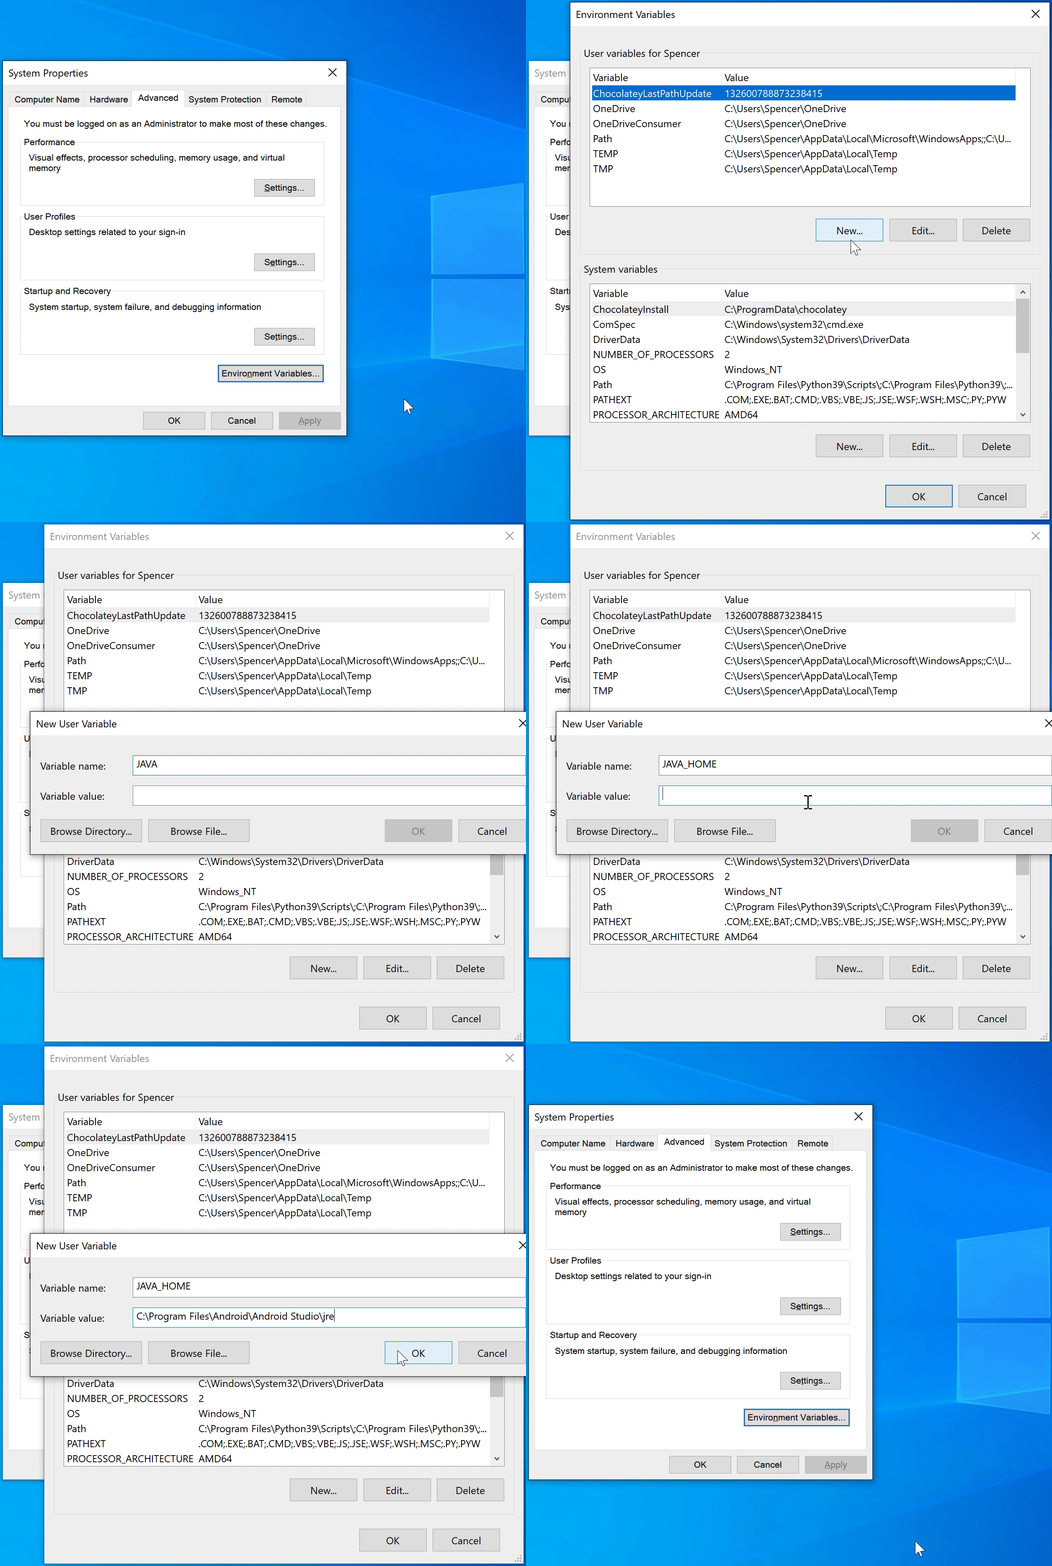
- Click
Environment Variables.... New...in the ‘User variables’ section.- Type JAVA_HOME as the variable name.
- Copy the following into variable value:
C:\Program Files\Android\Android Studio\jre
- Click OK.
We strongly recommend that you restart your computer now for Android Studio to open correctly.
Start Android Studio
Once installed, open Android Studio to work on the app.
There are multiple ways to start the Android Studio application on your Windows computer. Here are two methods:
Method 1
- Click the Windows icon in the lower left hand corner of your computer.
- Scroll through the list until you see the
Android Studiofolder. - Click the
Android Studiofolder to expand it. - Click the
Android Studioapplication in the folder to start Android Studio.
Method 2
- In the search box on the bottom left of the screen, type in
Android Studio. - In the results window, if “Best Match” highlights
Android Studio, either click theAndroid Studioapplication or pressENTERon your keyboard.
Open Project Files
- Click on
Open an Existing Projecton the start screen of Android Studio. - Look for the location where you downloaded the project files.
- Select the ‘TicTacToe’ folder inside of the ‘TicTacToe’ folder that you unzipped earlier.
- The ‘TicTacToe’ folder to select should have a green Android icon next to it, indicating it is an Android project folder.
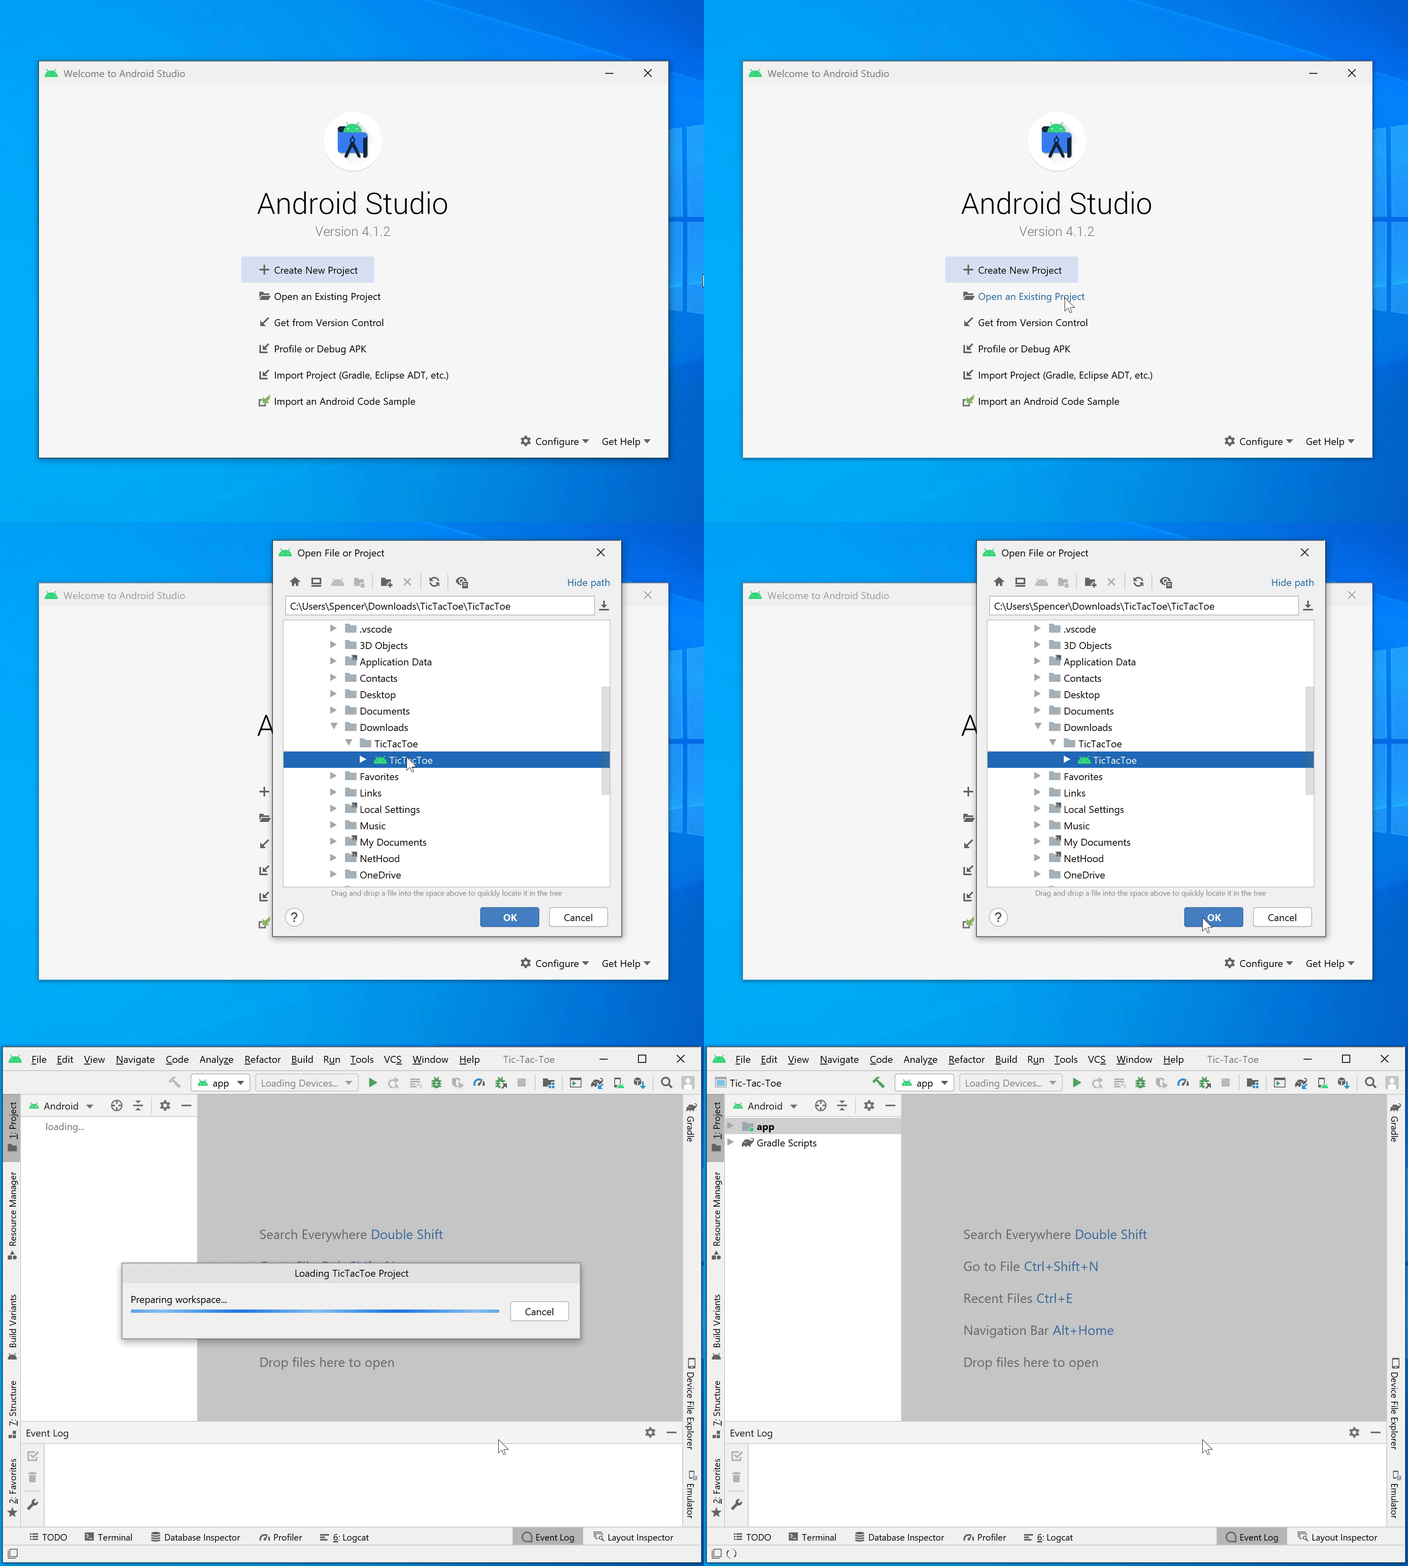
- The ‘TicTacToe’ folder to select should have a green Android icon next to it, indicating it is an Android project folder.
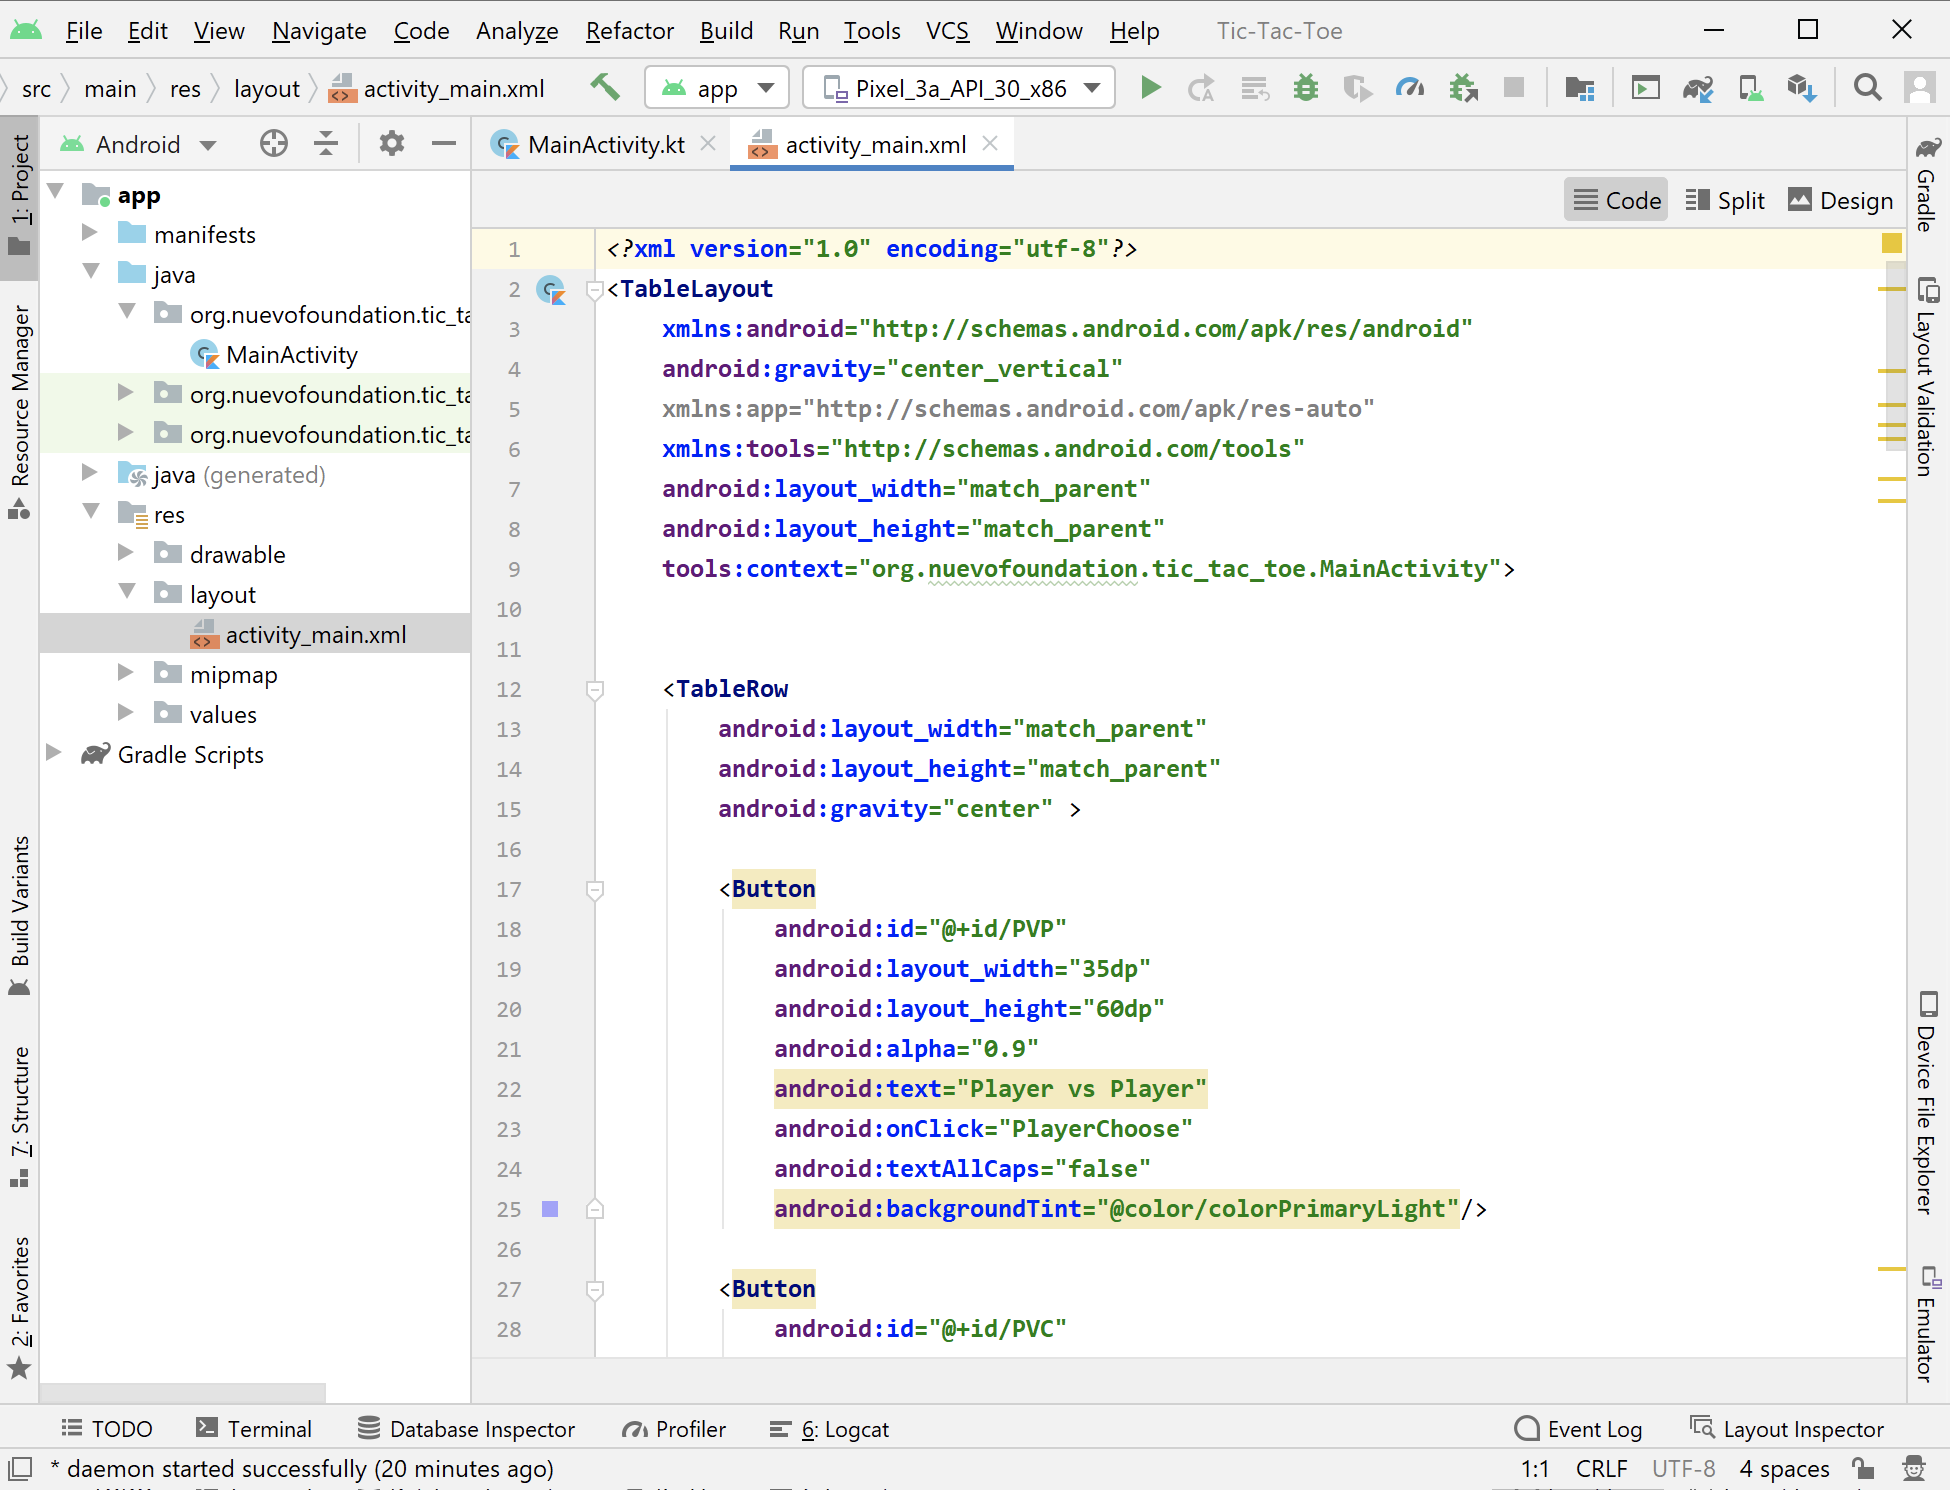
Run Android Studio and open the project. Your view will look similar to this:
Accept Licenses
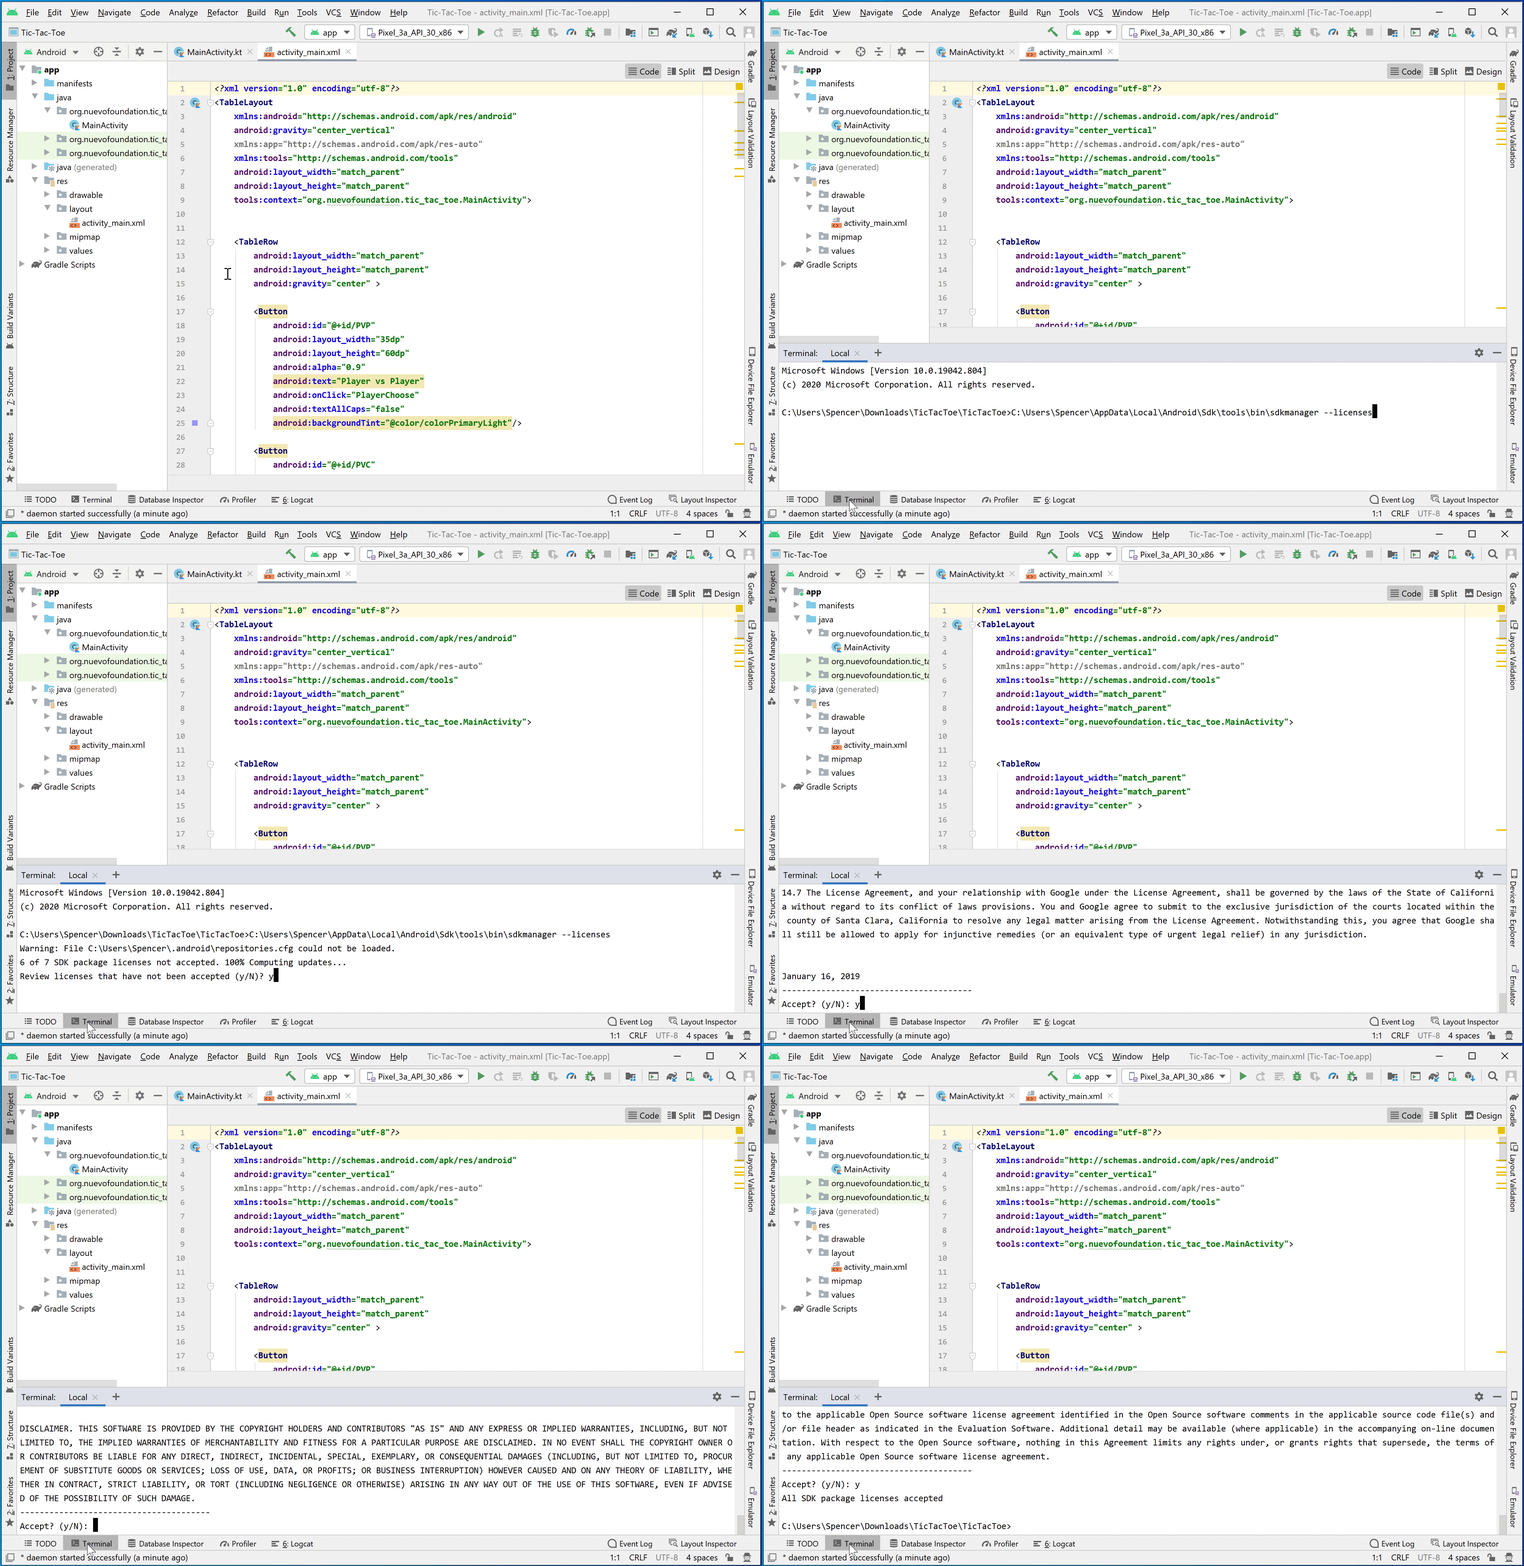
Before you can run the code, you’ll need to accept the Android licenses by following the steps below:
- Click the
Terminalbutton at the bottom of the Android Studio window. - Type the command below, replacing ‘<USER_NAME>’ with your computer’s user name.
C:\Users\<USER_NAME>\AppData\Local\Android\Sdk\tools\bin\sdkmanager --licenses
- Type
yand pressENTERat the prompts, to accept the licenses. This will be needed multiple times.