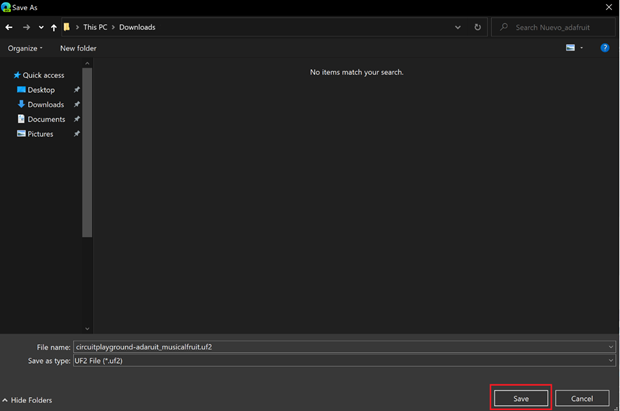
At the bottom of your workspace you should see this bright pink download button next to the name of your program. You can name your program anything, here it’s called adafruit_musicalfruit. Click on the download button.

You should see a window popping up, asking where to save your file. It should default to the Downloads folder, if not, navigate to your downloads folder and save the file there.
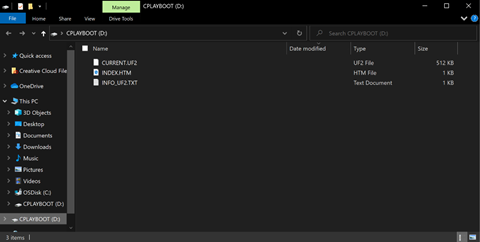
Now you can plug your USB cable into the computer. You should see some rainbow lights! This means your chip is on and running the default program. We are going to replace that with our program. Click the small reset button in the center of the chip. The lights should turn red then green. If your lights didn’t go green, quickly double click the reset button and wait a few seconds.

Once your lights are green, open up a Windows Explorer window if one doesn’t pop up. You should now see a CPLAYBOOT drive. Here it is shown as the D: drive but it could be E:, F:, etc.
Once you’ve verified that you can see this CPLAYBOOT, go to the Downloads folder and find the file that you saved there. You need to click and drag that file until you are hovering over CPLAYBOOT. You should see some text pop up saying “–> Move to CPLAYBOOT”. Drop the file there to copy it to CPLAYBOOT
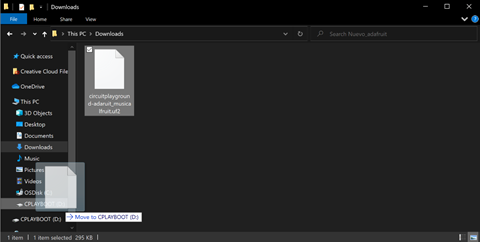
After you’ve dropped the file in the right place, the green lights will go away to indicate that you’ve successfully programmed your Adafruit!
CONGRATS! You’ve done it. Feel free to go back and tweak the sounds or your magic number in the comparisons. 👏🏽👏🏽👏🏽

You did it!
Workshop complete