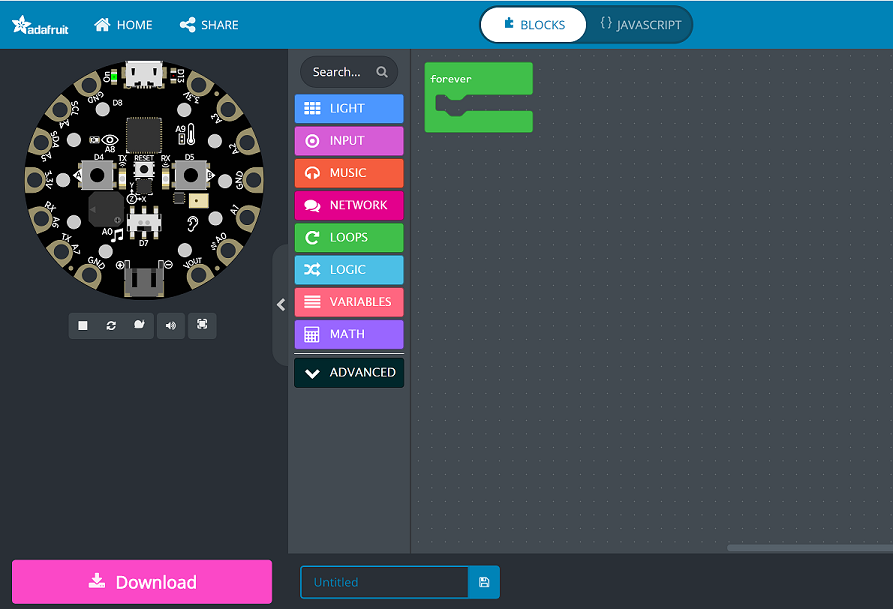
Open your favorite internet browser (such as Edge, Firefox, Google Chrome, Internet Explorer), and go to https://aka.ms/oranges . Your screen should look like this:
Defining the Variables
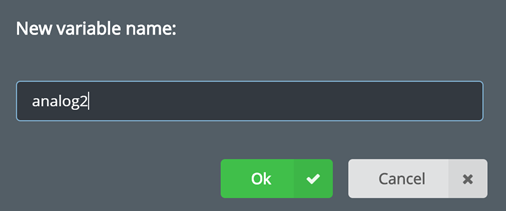
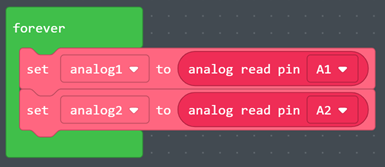
Today we are going to be using oranges to tell our Adafruit when to make noise. The first thing we need to do is give the computer a name for each orange and where to look for what they are saying. We do the first part by defining a variable. Click on the section that says VARIABLES, it is salmon colored and 7th from the top. Then define a variable by clicking on Make a Variable and giving it a name. Do this twice, here we define ours as analog1 and analog2 but you can call them whatever you want.


Interpreting out Inputs
Now that we have a name that our computer knows for our oranges, we must let our Adafruit know how to understand them. There are two kinds of inputs, digital and analog. Light switches and power buttons are examples of digital inputs. They are either on or off, 1’s or 0’s. Analog inputs are like a light dimmer or a volume button. They have more options for values. Our oranges are going to be analog inputs and how much we are touching or squeezing them will change the value they report to the Adafruit.
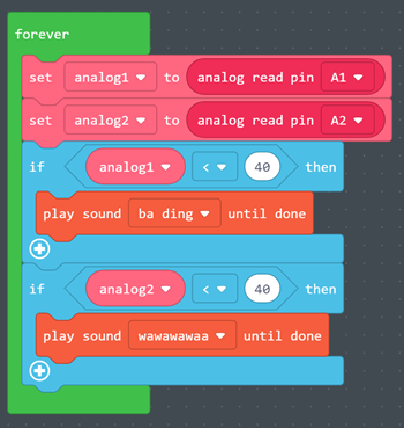
Click again on the Variables section. This time you should see a few more options now that we’ve defined our two variables. Drag one of the “set ___ to __” blocks into the green “forever” block in our workspace. Using the white down arrow, change the first blank to “analog1”.
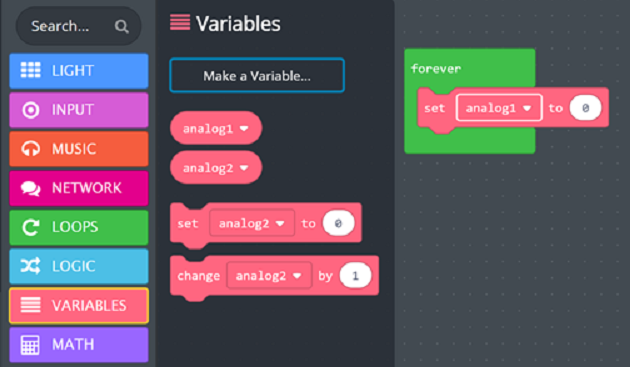
Next, click on the down arrow by ADVANCED then click on PINS. Look for the “analog read pin __” block, it will be third from the top, and insert it where the 0 is on our “set analog1 to 0” block is. To insert it into that slot, drag it so that it’s hovering over the zero, check that the 0 is highlighted in yellow, then let go of the mouse (or touchpad). You should see the block extend to accommodate the block. If you don’t see this, try again.

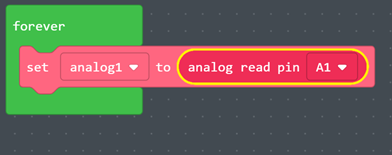
Once you’ve done that, your workspace should look like the above picture. Repeat this process again but this time use the white down arrows to select analog2 and A2. See below to verify you’ve done this correctly.
Creating our Loops
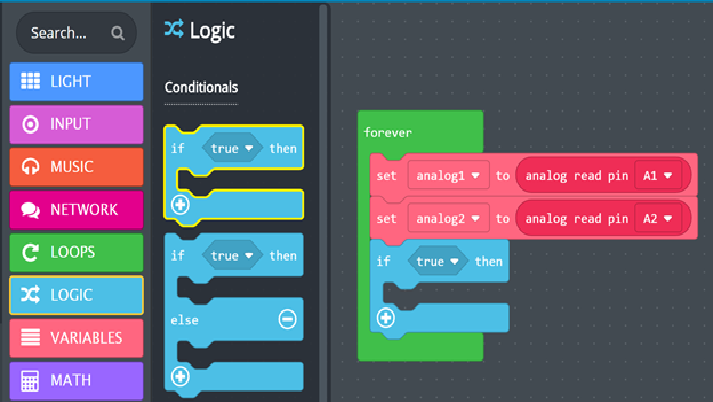
Now that our computer knows what to call our oranges, and how to understand what they are saying, let’s create a loop that will check for when we are holding our orange. Click on the LOGIC section and drag the “If ____ then” block out to put it under your variable blocks.
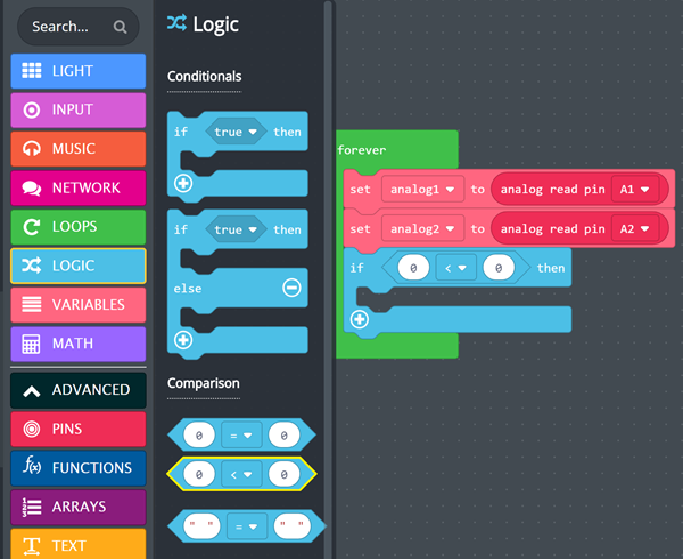
Let’s go back to the volume knob example to understand the comparison we are going to be making in our loop. Every person has a sweet spot for how loud they like to listen to their music to be able to enjoy it the most. This sweet spot is also true for our oranges. They’ll tell the computer a number when they’re just sitting there and a lower number when we touch them. The trick is to find the spot in between so that we only make noise when we want to.
To set this up, go to the LOGIC section again and grab the hexagonal “ __ < __ “ block that’s second under the Comparison subsection. Place that on top of the “true” in the “if __ then” block. Make sure you see the yellow highlight before dropping it there. Check the picture below to verify your workspace.
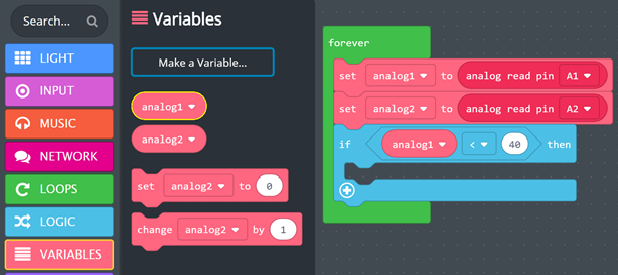
Now let’s put in what we are comparing. Go back to the VARIABLES section, pull out analog1, and put it in the first slot. Then click on the second slot and type 40. This 40 should be a good sweet spot for most people. If at the end, your orange is making noise without you touching it, you can come back to this step and make the number bigger. If your orange isn’t making noise when you touch it, you can come back and make the number bigger. For now, let’s just leave it at 40.
Now we can pick out our music! Click on the MUSIC section and drag the second block ”play _____ until done” into our If-Then block. Feel free to click on that down arrow and select your own sounds.

Now we want to repeat these last few steps for analog2. Once you do this, your workspace will look like the picture below (but with your music options).
Added Fun With Lights (Time Permitting)
The Adafruit chip has a lot of lights on it! They’re super fun to play with so let’s add a bit of color to our sounds so we can both see and hear the difference when we touch our oranges. Click on the LIGHT section and drag the “Set all Pixels to ___” block into our two If-Then chunks. You’ll want to drop them in right before we play a sound. You can click on the color portion to change which color you want to display.
